Gerard Mart�nez S�nchez I�m Gerard Mart�nez, a character 3D Artist and Instructor residing in Parets del Vall�s, a town near� Read More The Making of Miles Morales | Transforming 2D concept into 3D model with Character Creator ZBrush Pose...

Gerard Mart�nez S�nchez
I�m Gerard Mart�nez, a character 3D Artist and Instructor residing in Parets del Vall�s, a town near Barcelona.
Presently, I teach at various universities, notably in Barcelona and Latin America. This year, I�ve had the opportunity to collaborate with XP-Pen Spain, enabling me to bring art and technology closer to a broader audience and share my passion for both worlds.
Follow me through my social media profiles: Instagram, ArtStation, Linkedin, Website
.
Introduction
Welcome to this 3D tutorial, where I wish to start by expressing my gratitude to the Reallusion team for inviting me to share the details of the creation process behind one of my latest characters: the Miles Morales fan art which was featured in Spanish magazine Renderout! in their issue #41 � for December 2023. It�s an honor to take part in this experience!
In this making of, I�ll walk you through my process of transforming a 2D concept into a 3D model, capturing the essence and exploring the best techniques and key elements that will bring the character to life using some of the tools from Character Creator (CC).
_________________
Software Used:
_________________
A Pixar Touch
My main goal right from the start was to give the character a Pixar touch, as if it had dropped directly into their animated �universe.�
Before sculpting, I dedicated time to a thorough analysis of the original concept art from the movie �Spider-Man: Across the Spider-Verse,� created by Wendell Dalit. Exploring the details in the concept art provided me with a solid foundation for the project, allowing me to capture the essence and key elements that would contribute to the final result.
Next, I sought reference images for the body, suit, and clothing to start building a visual board in PureRef, which is a program that serves as a tool to efficiently organize and visualize visual references.
To search for references, I primarily use Pinterest because of how easy it is to find a variety of inspiring content that I can use as a reference. I also find inspiration on social media platforms like Instagram, Twitter, ArtStation, etc.
 �Sony Pictures Animation
Starting the Sculpting Process
Typically, I start with a Polysphere or a low-polygon density sphere to perform the Blocking. I prefer using the �Reference Views� function to place my reference behind my model, which makes it easy and quick to compare with the concept.
Next, I�ll share the various stages I follow to sculpt a character in ZBrush:
Blocking
What is blocking? Blocking is the initial phase in creating a sculpture or character. It involves using basic shapes such as spheres or cylinders to establish its main structure.
It is crucial because it lays the groundwork and structure before adding details. It helps ensure correct proportions and a solid anatomy, serving as the foundation for adding more details later. The goal is to create a solid foundation to work on subsequently, ensuring that the final sculpture looks coherent and well-constructed.
For instance, I represent each muscle using different spheres. To create these initial shapes, I used various spheres and cylinders with the �IMM Primitives� brush.
 Anatomical Blocking
Benefits of performing blocking
Quickly establish the basic proportions and volume of the final appearance of your model. Prevent issues throughout your creation process. Ensure that all parts fit together correctly before committing to the detailing stage.Refinement and Detailing
Once the basic shapes of the character have been defined in the Blocking phase, I move on to the detailing stage. In this phase, it�s essential to merge all parts and increase polygon density for better definition. To achieve this, I use Dynamesh and simply smooth with Shift, refining volumes and beginning to add details.
I spent quite a bit of time perfecting the face to achieve that moment where, upon seeing it, you can immediately say, �Hey, that�s Miles Morales!�
When working with a concept, it�s crucial to ensure that facial features maintain the proper proportions in relation to the overall shape of the head and body. For instance, achieving the right position between the eyes, nose, and mouth makes it easier to capture the character�s likeness accurately.
Next, the following step involves capturing the secondary details of the face, such as eye shape, mouth thickness, nose shape, eyebrows, among others. Once I have the head more resolved, I paint the iris of the eyes to give it more vitality and expressiveness, providing greater inspiration for sculpting.
In the Geometry menu, we can find the Claypolish tool. I use this option quite a lot to achieve a more defined and polished appearance, especially recommending it for cartoon or stylized characters.
For this style, the most important aspect is perfecting the volumes and refining the shapes.
 From Blocking to Detailing
Suit and Webbing
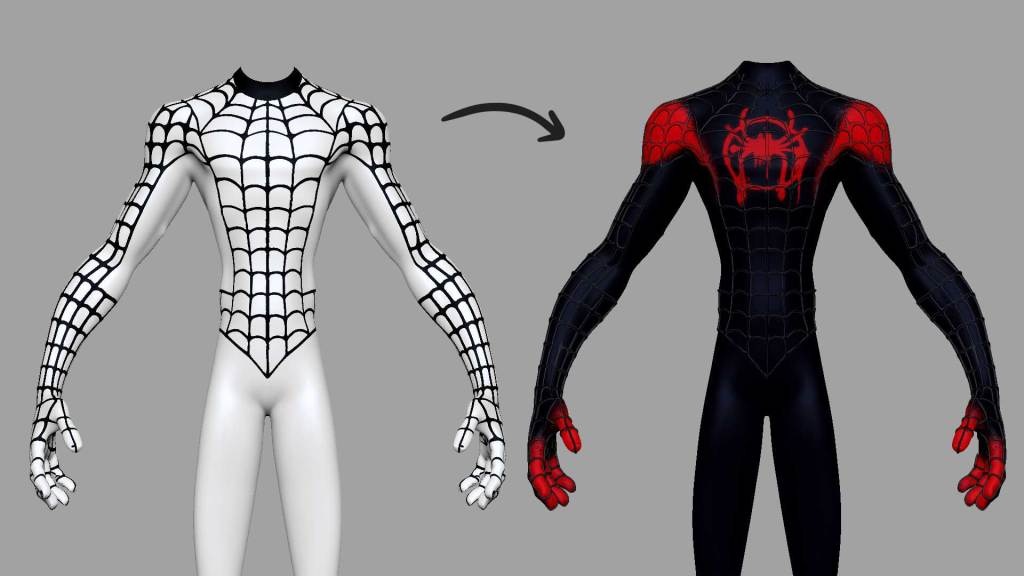
Once I had detailed the face and body, I proceeded to work on Miles Morales� suit from the first movie. Although I could have opted for the suit from the second movie, I felt a special connection with the more �handcrafted� and urban design of the first one. Since the first time I saw it, I was fascinated by the design, and it has been a sort of homage for me.
Additionally, I decided to merge elements from the suit worn by Tobey Maguire in the trilogy directed by Sam Raimi. My goal was to achieve a version of Miles Morales� standard suit with more realistic textures, incorporating raised web lines and a metallic touch instead of them being sewn into the fabric.
To achieve this, the first step was to draw the entire suit�s silhouette and then perform an �Extract�. Subsequently, I sculpted some details to emphasize certain muscles and began drawing the entire web pattern using Vertex Paint. I opted for the Lazy Mouse option for greater precision in tracing.
Later, I turned the masked stroke into a polygroup (Polygroups/From Polypaint), duplicated the body, and removed everything except the web mesh. Then, I cleaned up the geometry and finally extruded it to add volume.
 Steps for creating clothing
Hair
From the start, I knew Miles� hair was crucial as it�s distinctive and easily recognizable.
In �Across the Spider-Verse,� Miles Morales has a haircut known as a �taper blowout,� which means it has volume backward, lifts, and features a fairly defined fringe.
Firstly, I searched for more images of this haircut to gather inspiration. Then, I made an approximate blocking of the hairstyle and sculpted each curl individually. I used the Clay Buildup tool for shaping and the Move tool to position the curls in the desired direction
 High version
Retopology
Retopology is the art of remodeling a high-resolution model polygon by polygon, simplifying it, and making it more manageable for subsequent stages.
Retopology is an essential process that facilitates subsequent processes such as UV mapping or rigging.
 Retopology
In my case, I prefer to perform this stage in Autodesk Maya, which I find very practical and intuitive.
Before importing the character, I optimize it a bit in ZBrush using the Zplugin �Decimation Master� to prevent Maya from freezing due to the number of polygons. This tool not only allows us to reduce the geometry amount but also maintains all the detailing we have sculpted. However, it�s essential not to repeat the process too many times as doing so can lead to loss of detail.
Once imported into Autodesk Maya, I use the Quad Draw tool to perform polygon-by-polygon retopology, ensuring that the polygons have similar sizes and correct topology.
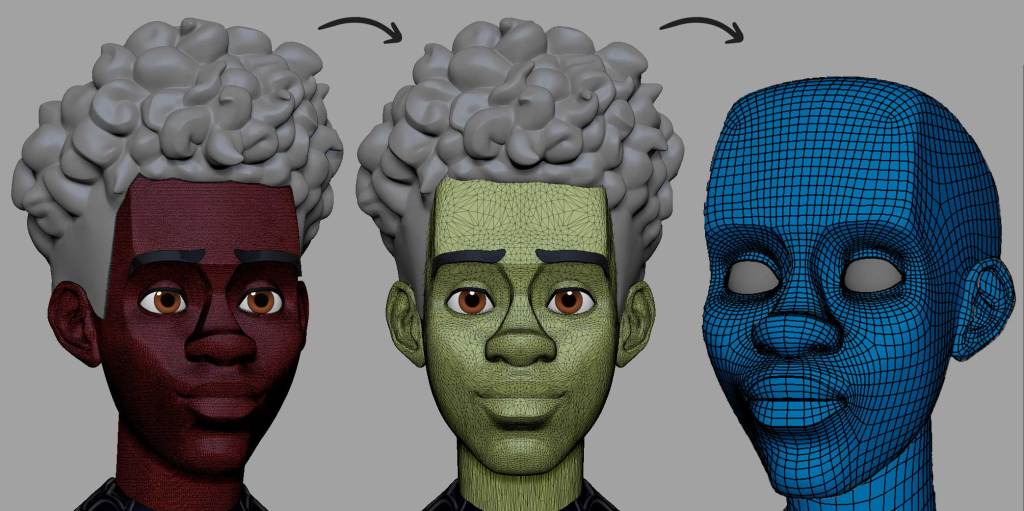 Retopology Process
UV Mapping
The UV Mapping serves as the bridge between modeling and texturing in a 3D model. It essentially involves unwrapping the surface of the 3D object to represent it in a two-dimensional space. Though explaining this process might seem complicated, let me explain it with a simple example for better understanding.
Have you ever tried origami? It�s a creative art form that involves folding paper to create various figures and shapes. In other words, you transform something two-dimensional, like paper, into something three-dimensional using this technique.
With my students, on the first day I explain UV mapping, I always bring a cube for origami. I choose a cube because it�s a quick and easy object to build. This way, we observe the mechanics that when we have it flat, we can draw or paint as we like, and then we assemble it to create the cube. Understanding this mechanic, I explain that UV mapping is the same but in reverse. That is, we have the three-dimensional object, and we need to transform it into 2D to texture it.
Another example I often use, especially during this holiday season, is chocolates wrapped in the shape of Santa Claus.

When performing UV mapping, each model has its own rules, but there are critical points to consider:
Hide cuts in inconspicuous areas. Ensure each part of the object is the correct size, similar to a puzzle. Fill all available space, leaving nothing empty. Avoid overlapping or crossing parts. Leave a small space between parts. Cut enough so that nothing looks odd.It�s also essential to consider Texel Density, ensuring consistent sizes among UV parts. In programs like Maya, you can set a Texel Density as a reference and then adjust each one to be the same size. This prevents having different resolutions for each area when applying textures, achieving uniform resolution across the entire model.
For the Miles Morales character, I had a specific pose in mind, so I made cuts on the back to avoid issues. However, if your character is for animation and will be seen from different angles, it�s advisable to clean from all perspectives, not omitting any, as you don�t know where or when the model will be displayed.
In this character, I organized my UVs as follows: the head, eyes, and body divided into the suit and the webbing.
 �UV Mapping � Head
Texturing
It�s time to give color to Miles in Substance Painter, and this is one of the stages I enjoy the most!
Before starting with texturing, I perform the bake of all the details from the high-resolution version and transfer them to the low-resolution version we created during the retopology stage.
Skin
I began the texturing of Miles Morales� face by using the �Skin Face� smart material as a starting point, then made some adjustments based on my preferences. The fascinating aspect of using Smart Materials is their versatility, making customization easier.
Initially, I adjusted the Base Skin layer to a tone more similar to Miles�. Then, I duplicated the �Skin Pores� layer, adjusted the pore size using the tilling value, and strategically distributed them according to facial areas. All these adjustments were made using layer masks.
Later, I created a new folder named �Skin Shade�. Within it, I added several fill layers to introduce more skin tones. Next, I moved to what I call �Breaking Up.� At this stage, the colors on the face seemed too smooth and unnatural for my liking.
To address this, I added a fill layer, applied a black mask, and used a procedural map with the �Add generator.� I chose �Tri-planar Advanced� and applied �BnW Spots 1� to alter the color mask. As a result, the skin gained a more realistic and detailed appearance.
 Skin Texturing
Eyes
The eyes were simply created by designing a texture in Photoshop and then projecting it onto Substance Painter with a roughness value set to 0.
Suit
Finally, for Miles Morales� suit, I started by adding a black fill layer for the entire suit. Then, I projected the spider symbol that I easily found on the internet.
To add an artistic touch, I used a predefined brush in Substance called �Paint Spray,� creating a spray-painted effect.
Lastly, I applied the smart material named �Fabric Super Hero� to add texture to the suit using its height map
 Suit Texturing
Exporting
Once I had all the textures for the character, I began the export process. The setup I used was for Arnold (Ai Standard), in PNG format with a resolution of 4096.
Posing
Now it�s time to bring the character to life and give it expressiveness. I was sure that the pose I wanted for Miles would have a youthful vibe.
In the past, when I was more junior, I didn�t enjoy this stage much; sometimes, I left the character in a T-pose and rendered it as is. But over time, I�ve realized how crucial posing characters is. My advice: dedicate time and care to the pose.
I used to use ZBrush to pose my characters with the Transpose Master tool.
However, since I had the opportunity to try Character Creator�s AccuRIG and ZBrush Pose Tools, I now always use this workflow for posing. I highly recommend experimenting with the integration of ZBrush, AccuRIG, and Character Creator (CC).
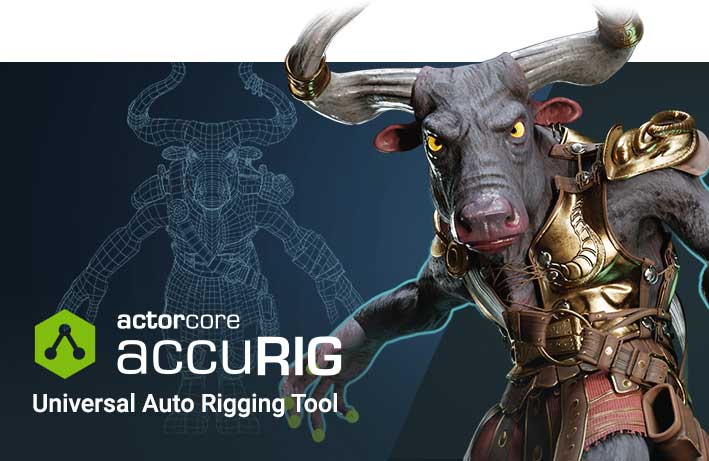 Character Creator 4 � AccuRIG
To pose Miles, I prepared him before exporting to Character Creator.
It�s crucial to keep in mind that the ideal polygon count for models sent to AccuRIG should be under 300,000. Therefore, if you need to sculpt details that require high polygon counts, use ZBrush�s subdivision functions or other optimization techniques.
It�s also important to ensure that your model�s physical size aligns with Character Creator. You�ll find size unit parameters at the top of the free Pose Tools plugin. There are some preset height adjustments for metric or imperial measurements, or you can use the slider to set it manually. If your character has layers, be sure to merge them first to ensure a uniform size change.
Once the scale is set correctly, click the Resize button and confirm the model�s size. After this step, we can send the model to CC using GoZ, which will send the currently selected subtool. Once in CC, we�ll use AccuRIG to automatically link a skeleton to this character.
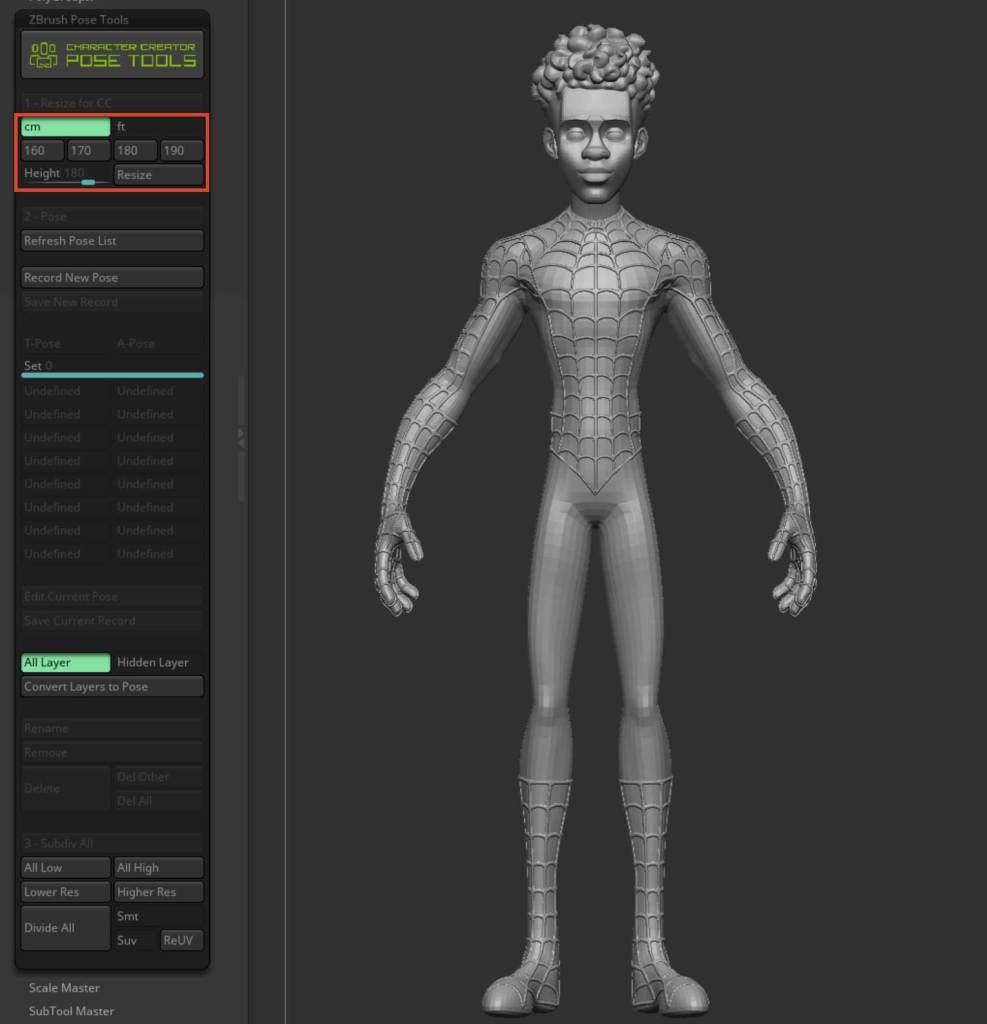 ZBrush Pose Tools � Resize
Once imported into Character Creator, the first step is to automatically detect the character�s joint positions. This is done by clicking the �Create Guides� button. After clicking �Create Guides�, the character�s joint markers will be generated. You can choose different display settings, including Wireframe over Shaded mode, for more precise placement if desired.
 AccuRIG � Create Guides
Next, we�ll set the number of fingers for our character and click �Generate Skeleton� to produce our skeleton.
Here, we can adjust the bone color for better visibility and refine the position of the generated bones.
 AccuRIG � Generate Skeleton
Once the skeleton is linked, skin weights are assigned to meshes related to body parts and clothing. This ensures realistic movement and separates solid accessories that should not be attached to the body.
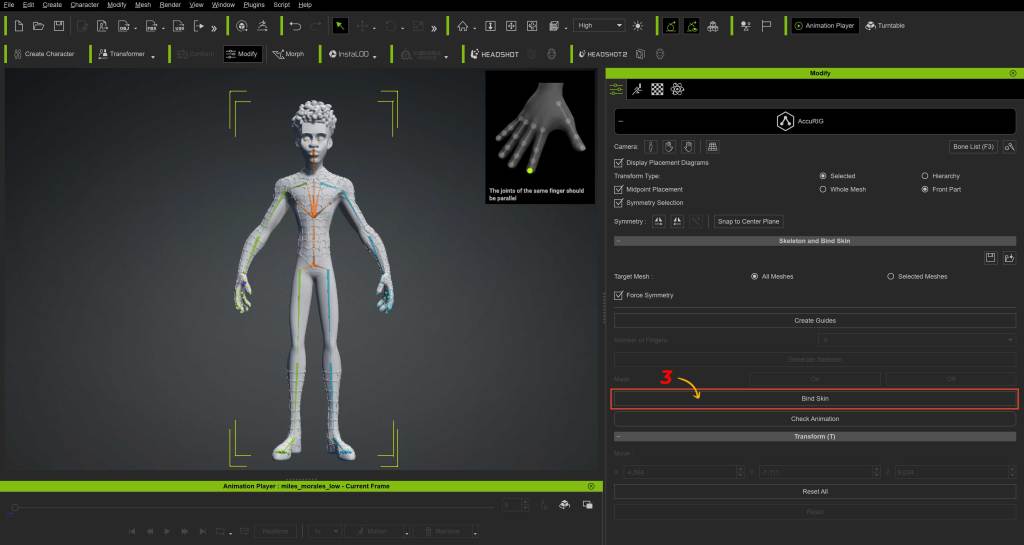 AccuRIG � Bind Skin
Processing time may vary based on your character�s complexity and your computer�s speed. When the linking process completes, the skeleton�s color changes, and solid objects not previously selected are now categorized as separate accessories.
The most interesting aspect is that we can manually adjust all the bone weights provided automatically by AccuRIG. To do this, we�ll click on the �Skin Weights� button and then be able to manually paint the skin weights for each bone, allowing us to improve the entire skinning process.
 Skin Weights
In �Edit Pose� is an essential tool to bring your character models to life. It enables easy creation and adjustment of custom poses, providing the ability to express emotions, dynamic movements, and subtle details. With intuitive controls, this editor enhances creativity by offering a wide range of options to refine the posture and attitude of your characters with precision and realism.
 Edit Pose
After adjusting the pose in Character Creator, we send the current pose to ZBrush using the Pose Link plugin. Renaming poses immediately is essential for organization.
Editing in ZBrush is crucial for refining the pose and accessories.�
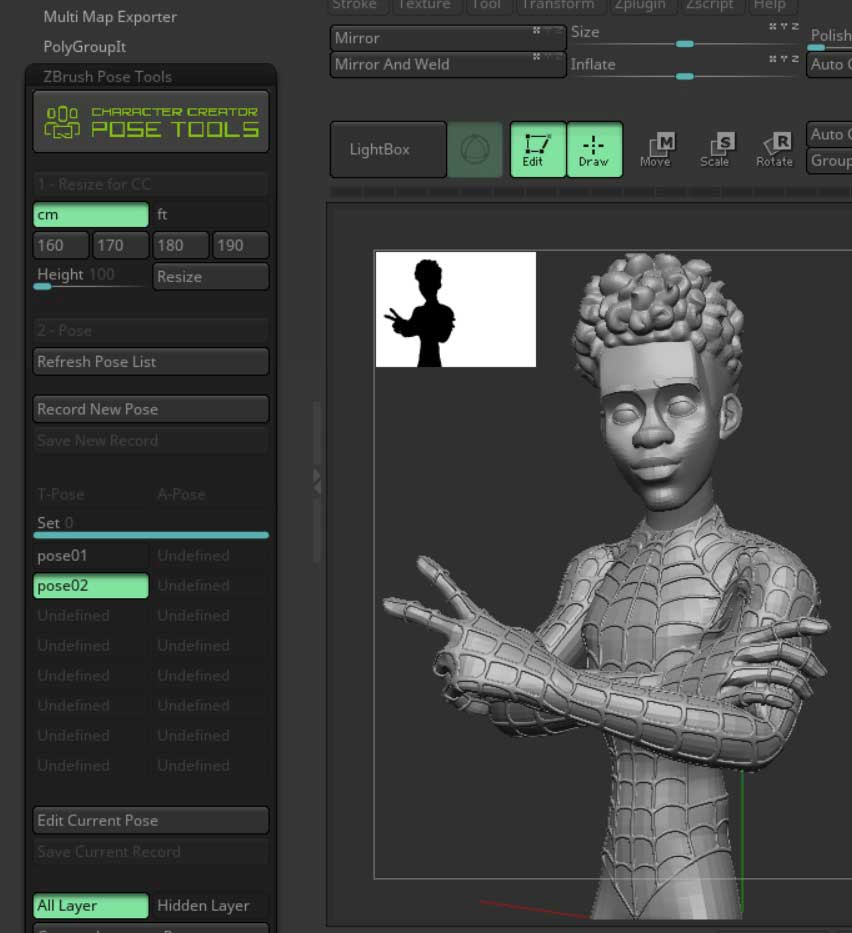 ZBrush Pose Tools
Furthermore, model subdivision allows for adding details like skin wrinkles or muscle definition.
Once editing is complete, save the file. It�s essential to save in both ZBrush and Character Creator to ensure continuity. CC�s pose management easily updates when loading the project, allowing a smooth transition between programs.
Definitely, there are several reasons to consider using this combined program (Character Creator and ZBrush) for character creation and editing:
Seamless creation of custom poses: The integration between Character Creator and ZBrush makes it easy to create and edit custom poses for your character models. This allows you to breathe life into your creations with unique and realistic movements. Workflow optimization: The Pose Tools and Pose Link plugins streamline the process of transferring poses between programs, saving you time and avoiding technical complications. Compatibility and versatility: The AccuRIG tool simplifies skeleton linking and skin weight assignment, ensuring characters are compatible with a wide range of movements and accessories. Detail and realism: The ability to make manual adjustments in ZBrush allows for enhancing anatomy and clothing details, achieving more realistic and detailed visual results. Extensive motion library: Character Creator offers a vast library of built-in motions, with the option to access more motions and poses through online marketplaces, providing an unlimited spectrum of possibilities for your characters.Overall, using these programs together provides an efficient workflow, powerful tools for pose customization, and the ability to create characters with exceptional levels of detail and realism.
Shading and Lighting
For the final render of Miles Morales, I aimed for a blend between the film�s style and a look closer to cartoon animation, while still maintaining my personal style. During this stage, my usual approach involves applying maps within the Arnold aiStandardSurface material. I apply the Base Color texture to both the base color node and the Subsurface Color. Additionally, I connect the roughness map, the metalness map, and finally, the normal map.
 Skin Shading
The shading for the webbing was opted for a completely black tone with a subtle shine.
For the lighting, I used a setup called the �three-point light� scheme. This scheme is primarily used in 3D productions and virtual settings to illuminate objects or characters in a 3D environment, achieving depth and realism. To achieve this, I incorporated an HDRI with low intensity as the primary light source to capture some reflections.
Next, I added a Key Light (Primary Light) using an Area Light type, illuminating the character from a specific angle to simulate a primary source. I adjusted the intensity, color, and temperature according to the mood and style I desired. I positioned the Fill Light on the opposite side of the primary light to soften the shadows and balance the illumination. The Rim Light was placed behind and above Miles to create a �glow� around him and add more depth.
Finally, in the finishing adjustments, I added backlights to illuminate the environment and adjusted the light intensities to achieve the desired effect. I experimented with shadows and reflections to achieve the desired result.
 Lighting
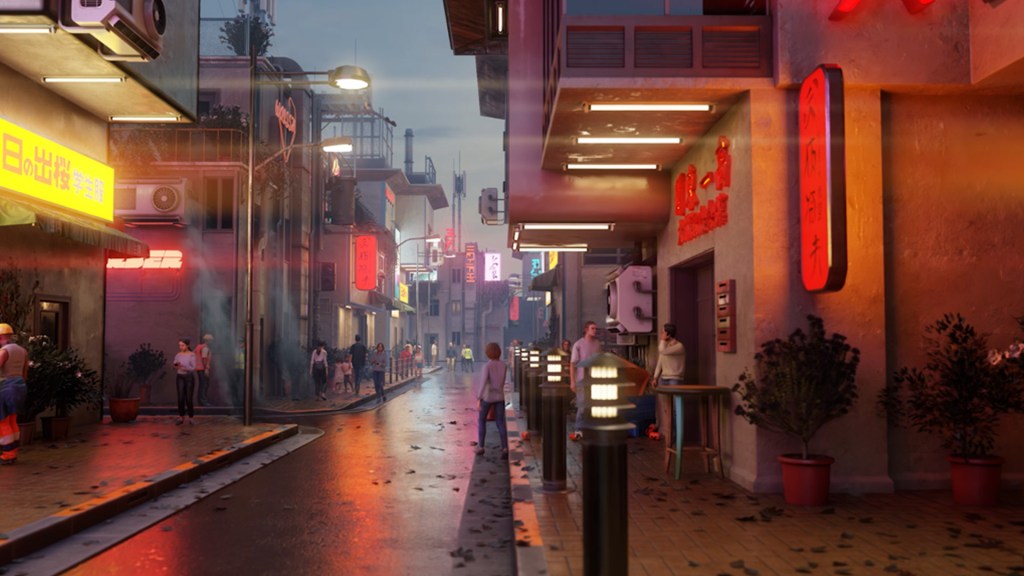
Once rendered, I had the collaboration of my friend and neighbor Eliant Elias (Concept Artist), who helped me design the background to achieve the movie�s style. Thanks, Elias!
Finally, I want to express my gratitude again for this opportunity to explain the process behind one of my characters. It has been an absolute pleasure to collaborate with a company like Reallusion! Thank you!
I hope you�ve enjoyed this behind-the-scenes look. Until next time!

Follow Gerard Mart�nez S�nchez:
Instagram:
https://www.instagram.com/gms.3dart/
ArtStation:
https://www.artstation.com/gms3dart
Linkedin:
https://www.linkedin.com/in/gms3dart/
Website:
https://gms3dart.com/
???? The Making of Miles Morales | Transforming 2D concept into 3D model with Character Creator ZBrush Pose Tools ????? Reallusion Magazine?