Whether it�s to make grass or hair, XGen is a powerful tool within Maya that can help take your models to the next level. In the tutorial below, AnimSchool Instructor�Koji�Tsukamoto shows us how to get started in XGen.�XGen can...
XGen can be an intimating tool. A tool that is well known for crashing and not playing nicely with artists.�
Getting started with such a tool is a daunting task. With Koji's guidance, we can get a better grasp of XGen, breaking down his method step by step. Before we pick up with Koji, take a look at the instructions�below!�
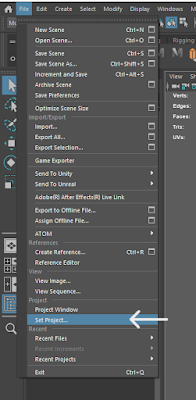
First thing to make sure of, set your Maya project.�
Without your Maya project being set, you will have many issues and glitches down the line.
�
Now you would head on to the XGen Shelf.�Where we will then click on the XGen Menu Icon, this will start up XGen within Maya.�
Make sure to have your Mesh selected & click on Create New Description.�
The description name will be the portion of the head (or other object) that you will be covering with XGen material.�
The Collection Name on the other hand is the group of hair types on one object.�
For example, a description would be �Back of Head� but the collection would be �Main Hair Style�.�
For this tutorial, Koji elects to choose �Splines� for the primitives options in order to have more control over placement.�
Go ahead and click Create to get going.�
Use the �Add or Move Guides� tool found in the middle of the menu icons.�
Start by outlining the object with guides.�
Once you�ve done this, now you can move on to using the �Sculpting Guides� Tool in order to have more control over the guides� flow and positioning�
He then goes back to the �Add or Move Guides� tool and places more guides.�
As you give XGen more information with the more guides you place and sculpt, XGen will approximate each new guide by averaging out the guides around it. This happens as you place more and more guides on the object.�
Right clicking, copying and pasting guides also helps expedite the process.�
Watch Koji�s video below for an in-depth look at his technique for XGen.
Examples of Student work with XGen�
AnimSchool Student Anastasia Generalova


.png)