This is a follow-on to the previous post showing how to setup your Mac for iOS testing. If you haven�t read over that one - this article draws assumptions that your Mac is setup in a certain way, or...
This is a follow-on to the previous post showing how to setup your Mac for iOS testing. If you haven�t read over that one - this article draws assumptions that your Mac is setup in a certain way, or that you know what you�re doing otherwise. Feel free to go read that first, I�ll wait..
Alright, now that we are all on the same page, let�s tackle the second piece and get your iPhone setup for research and testing. This guide will be very similar to the last in its simplicity, with the assumption that you are not a command line expert. But before we move on, let me repeat - THIS IS FOR RESEARCH AND TESTING.� Please don�t read this and think it is a great idea to jailbreak, load binaries onto, or otherwise press a bunch of buttons on evidentiary devices in criminal cases, or devices being inspected for civil or corporate investigations. I�m not saying you can�t do it, but make sure you understand what you are doing to the device, can explain that to someone else, and understand there are certain risks involved with jailbreaking a device.
You will need to have setup your iOS device with an AppleID and general account stuff before you can start this process. The assumption for this guide is your iDevice is at the home screen where you can use it - meaning it has been setup with whatever account you intend to use. Real you, fake you, real someone else - just kidding (but seriously don�t be an a-hole).
Jailbreak Time
If you are unfamiliar with jailbreaking - read this carefully; don�t skim it.�
This is not hacking. We are gaining privileged access to the root of the file system. Apple has setup your iDevice so it�s not easy to break things. When we jailbreak using publicly available jailbreak methods, we accept a certain risk that some harm could come to the device or its data during the jailbreak process. Please don�t mistake that warning for distrust in the FREE work the amazing jailbreak teams do to support the research and security communities. Without the jailbreak folks, mobile forensic research would be significantly diminished. If the jailbreak process goes smoothly (which it will), you now have the ability to break things. There was a time where I was extremely apprehensive about jailbreaking, mostly because I had to get over the fear that by clicking the button to start the jailbreak I might brick my device. While that certainly could happen, I will tell you I have used publicly provided jailbreaks for years now on a myriad of different iDevices and I have never caused any one of those devices to be unusable.�
Before we decide to dive into jailbreaking, you need to understand one very important thing. Your iPhone is a piece of hardware, which has an operating system running on it, and for a jailbreak to be successful it must accommodate both your hardware and OS version. If you want to jailbreak a test device, you need to closely monitor which OS version is currently available vs. which OS version is able to be jailbroken for your piece of hardware. In a perfect world, you want your test device to have the latest version of iOS that is able to be jailbroken.�
A great resource I use to determine which jailbreak method I can use for the hardware and OS version I am trying to jailbreak is https://www.theiphonewiki.com/wiki/Jailbreak.
One device I have is an iPhone 11 Pro on iOS 13.5. This isn�t the ideal test device because it isn�t susceptible to the checkm8 hardware exploit, but it is the newest device available right now. So we are going to start with the more difficult process on the newest iPhone and work towards the easier method on an older iPhone X. When the checkm8 age of iOS exploitation is gone, this method via Cydia Impactor might be the way you will jailbreak - because this is the way it was done prior to checkm8. Every jailbreak is different though, so no need to commit to anything just yet.�
Using the guide from theiphonewiki.com, I scroll down until I find the table containing a row for iOS 13.5 and column for iPhone 11 Pro. I find that my device is able to be jailbroken using unc0ver version 5.2.0. If I was keeping my device�s OS perfectly updated, it would be at iOS 13.6 at the time of writing. There is no jailbreak available for 13.6 right now, so this is why you have to pay attention and only update your OS when a jailbreak is available for the version you are upgrading the device to. You have to be diligent with this to keep your device jailbroken while updating to relevant OS versions. If you are using a personal-use device for your testing, you have to realize that by not keeping your OS updated, you are potentially saying �no thank you� to relevant security patches and new features.�
In a perfect testing scenario where money is no issue, the coffee and pastries are free, and you ride a unicorn to your corner office with a perfect view, you would have an iPhone on each OS version and never upgrade them. You would have a library of all iPhone covering allOS versions, so very specific test scenarios could be achieved - but this is a very expensive approach and is certainly not something I am personally going to do.

unc0ver Jailbreak Method
How to jailbreak using unc0ver via Cydia Impactor for iPhone 11 Pro with A13 processor on iOS version 13.5 (requires Apple Developer account)
If unc0ver is the jailbreak that works for your hardware and OS, here are steps to follow to successfully jailbreak via Cydia Impactor. Note, this method requires you to have a paid Apple Developer account. A paid account costs about $100 per year, so I maintain a dev account for this reason. If you don�t want to sign up for a developer account, there are two other free options listed on the unc0ver.dev page for jailbreaking via �AltStore� or �Xcode + iOS App Signer.��
You are going to need Cydia Impactor on your Mac for the method I use, but there are other options available. Check unc0ver�s site for other options that are free, but we are going to use Cydia Impactor for this guide. Essentially what we are doing here is side-loading an application onto your iPhone. You aren�t going to find jailbreak applications on Apple�s App Store, so we are going to use Cydia Impactor to push an application onto your test iPhone instead.
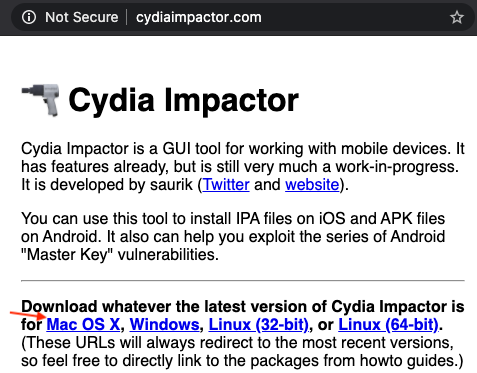
1. Go to cydiaimpactor.com and click the download link for Mac OS X. It will download a .dmg (disk image) file.
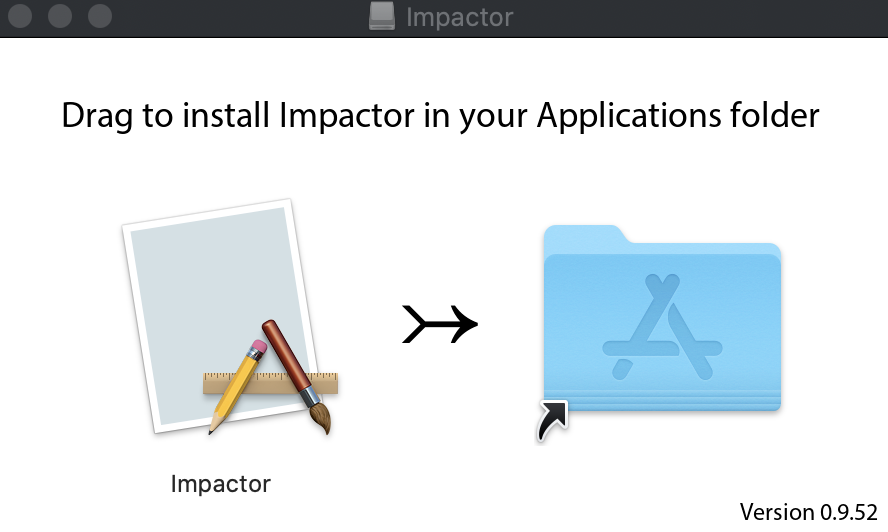
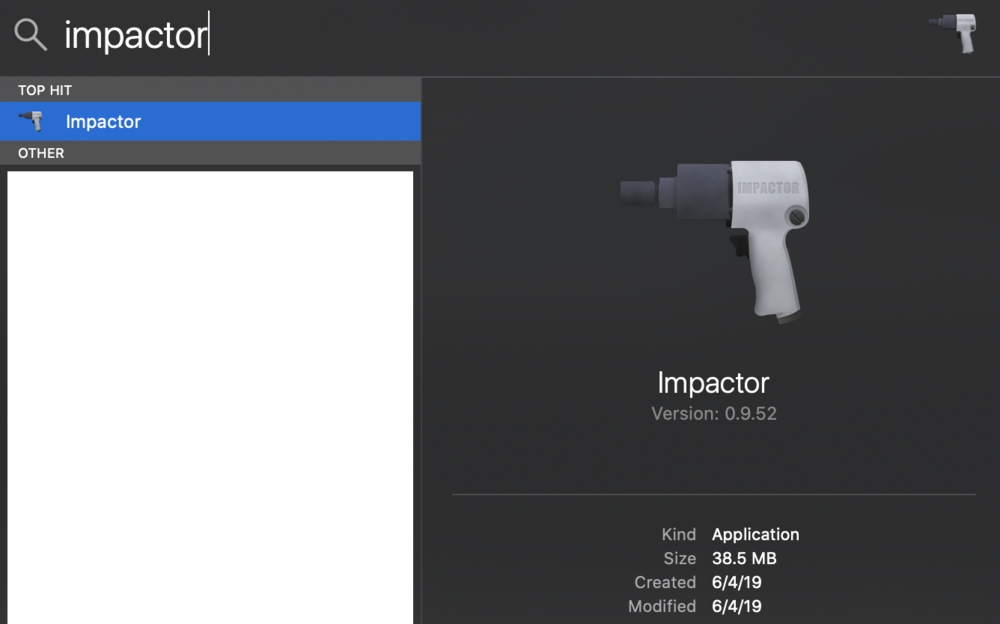
2. Double click .dmg file then drag and drop Impactor into your Applications folder. Cydia Impactor is now installed. To find it, hold �command+space bar� and use Spotlight Search and type �Impactor� and select the result. You may get a warning that Impactor was downloaded from the internet and could be malicious - yup, got it, thank you Apple.�
3. Download the .ipa for unc0ver - Go to unc0ver.dev and then click �Download v5.3.1� or whatever version it lists at the time you are reading this. This will download the .ipa file which is the application that ultimately jailbreaks the device.

4. With your iPhone connected via USB and Cydia Impactor running, you should see your iPhone�s friendly name and UDID in the top field. In the bottom field it probably says, �install Cydia impactor� which is not what we are doing, ignore that for now and DO NOT PRESS START!

5. Drag the unc0ver .ipa file we previously downloaded into the bottom field of Impactor and drop it there.�

6. After dropping the file, a box pops up and asks for your iTunes email login, enter your Apple Dev account email address and press OK.
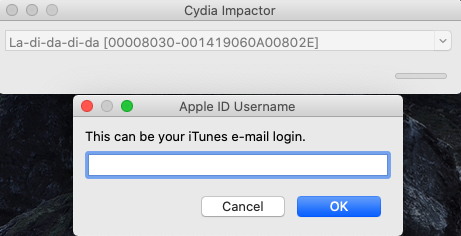
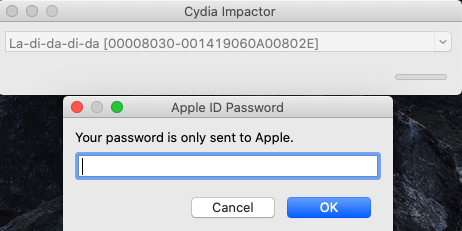
7. Apple ID Password box appears:
If you don�t have two-factor authentication turned on for the dev account, you can enter your AppleID password here and press OK.�
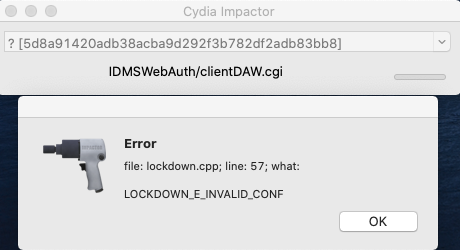
If you enter the AppleID password, but two-factor authentication is turned on and it fails - no big deal. Keep reading, but this is the error you will get.
If you do have two-factor authentication turned on, you need to go to appleid.apple.com and login to your dev account.�
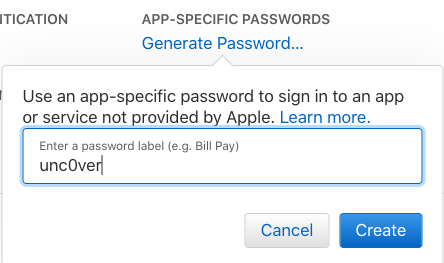
Once logged in, you will see an account dashboard. Look in the �Security� section where it says �APP-SPECIFIC PASSWORDS� and click �Generate Password��
Enter a label for the password you are about to generate - it doesn�t matter at all what you put here. Click �Create.�
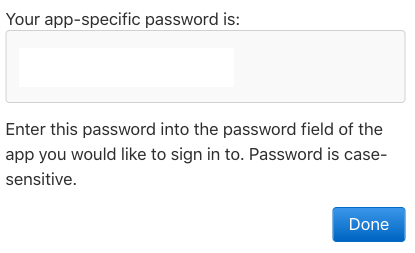
An app-specific password will be generated. Copy the password and paste it into the password box in Cydia Impactor. Click OK on Cydia Impactor.
8. Cydia Impactor will run through the application installation and should complete without any errors. Once completed, it goes back to the appearance where it displayed the iDevice name, UUID, and �install Cydia Extender�.
9. Check your iPhone for the unc0ver application and Cydia.

10. Open unc0ver application.
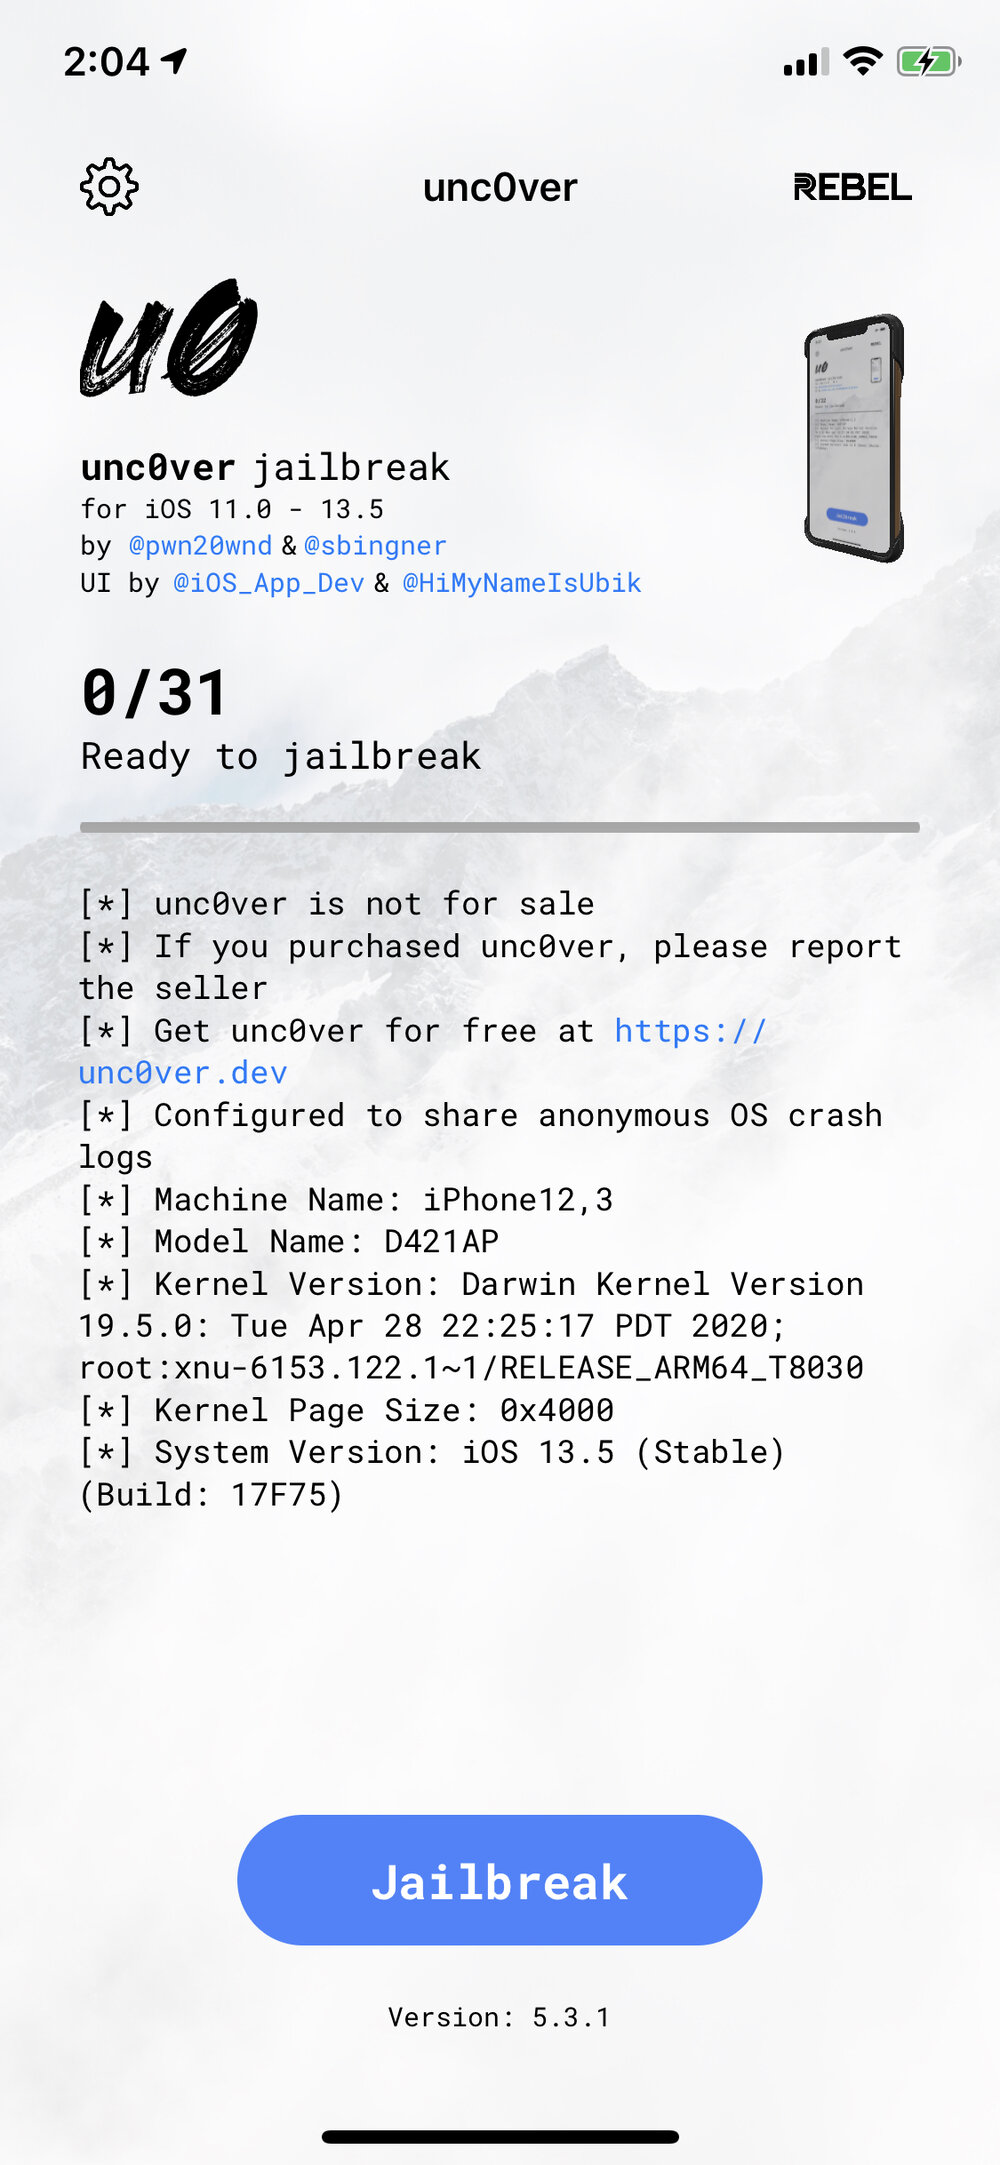
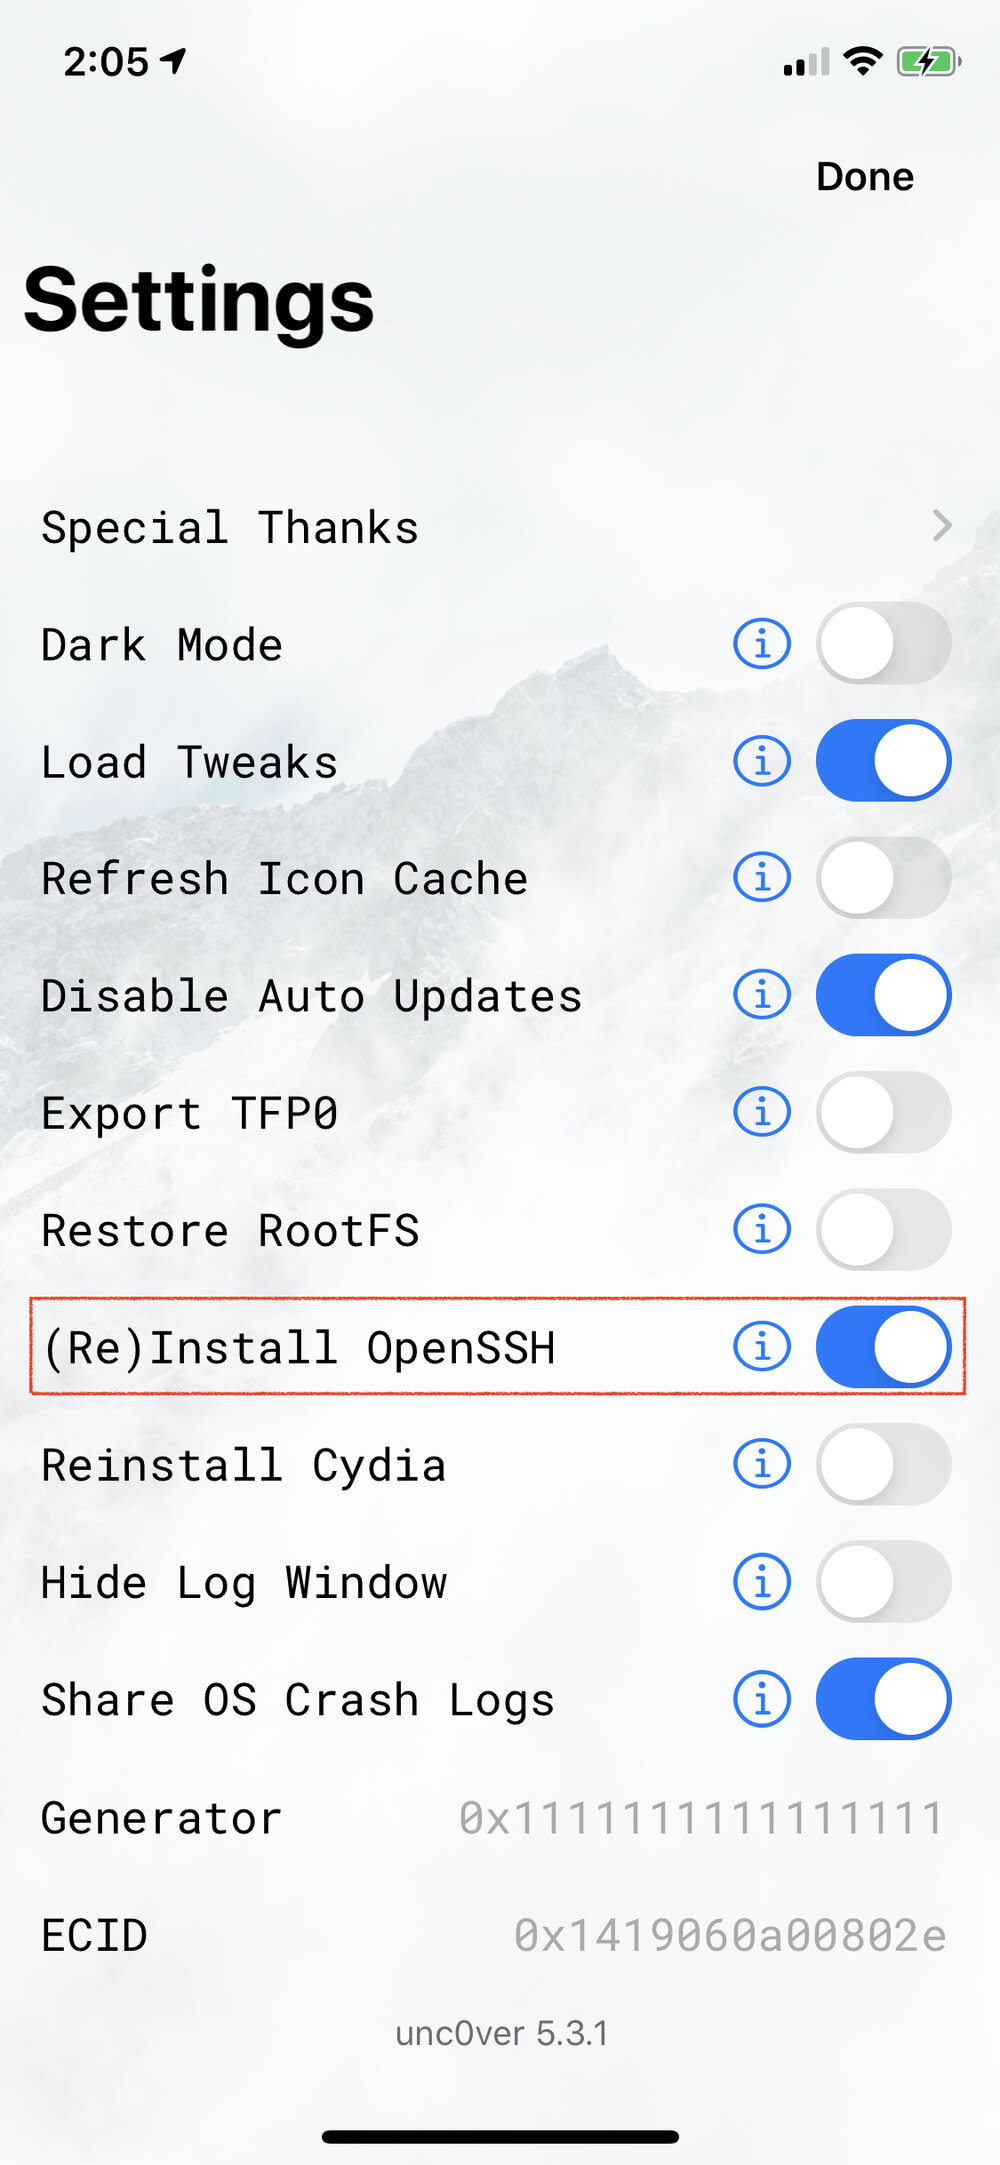
11. Select Settings gear in top left of screen. In Settings, toggle (Re)Install Open SSH to ON. This is going to allow us to communicate between our Mac and the iPhone. Select �Done� in top right corner and return to main screen.
12. Press �Jailbreak� button. After an advertisement, you will get a pop-up that says �Jailbreak Completed. No error occurred. The device will now reboot into the jailbroken state.� Press OK and the device will reboot fairly quickly and your device is now jailbroken!

checkra1n Jailbreak Method
The checkra1n jailbreak is a semi-tethered jailbreak based on the checkm8 boot ROM exploit. The checkm8 exploit was discovered and announced in September of 2019. It unveiled a vulnerability that essentially allows jailbreak access to the iPhone 5s, iPhone 6, iPhone 6 Plus, iPhone 6s, iPhone 6s Plus, iPhone SE (1st Gen), iPhone 7, iPhone 7 Plus, iPhone 8, iPhone 8 Plus, and iPhone X - regardless of the OS version as long as it is 12.3 or higher. If you are deciding on which iPhone to purchase to dedicate to testing and research, my suggestion would be the iPhone X. Technically the iPhone 8 was released at the same time as the iPhone X, but the iPhone X includes FaceID which the majority of current iPhones employ as their unlock method. If you want to do TouchID specific testing, then perhaps the iPhone 8 or 8 Plus makes more sense. I acquired an iPhone X and an iPhone 8 Plus so I have both available if necessary. If you are buying two test devices, maybe get one of each. Essentially the oldest phones exposed by this vulnerability will be the first ones that Apple drops OS support for. The iPhone X is the �newest� older device with the vulnerable chipset, and therefore will be the last device to be aged out by Apple eventually dropping OS support for it. There are rumblings that Apple may have found a way to combat this vulnerability for iOS 14, but for research devices that you know the passcode to everything should still be fine.�
How to jailbreak using checkra1n for iPhone X with A11 processor on iOS 13.6.1
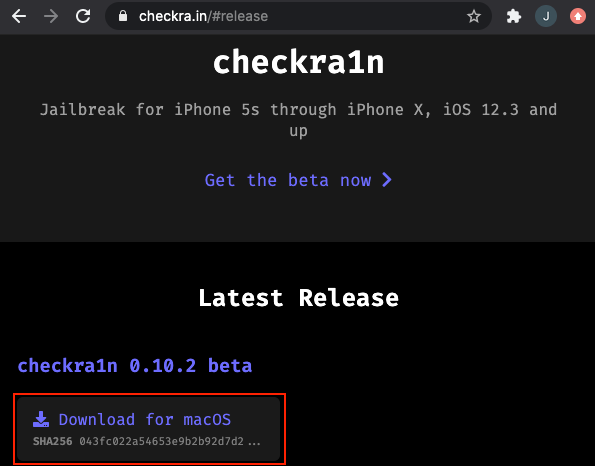
1. On your Mac, go to checkra.in in a web browser, scroll down and click �Download for macOS� and the checkra1n .dmg file will download.
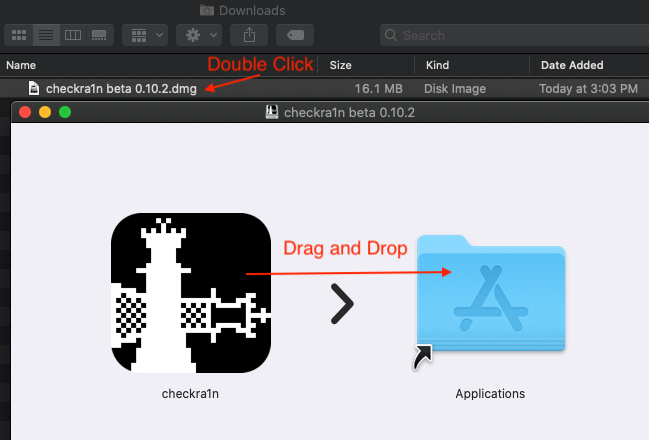
2. Open your Downloads directory and double-click the checkra1n beta <version>.dmg file. After it opens the disk image, drag the checkra1n application over into the Applications folder.
3. Press �command+space bar� and use Spotlight Search and type �checkra1n� and select the application.

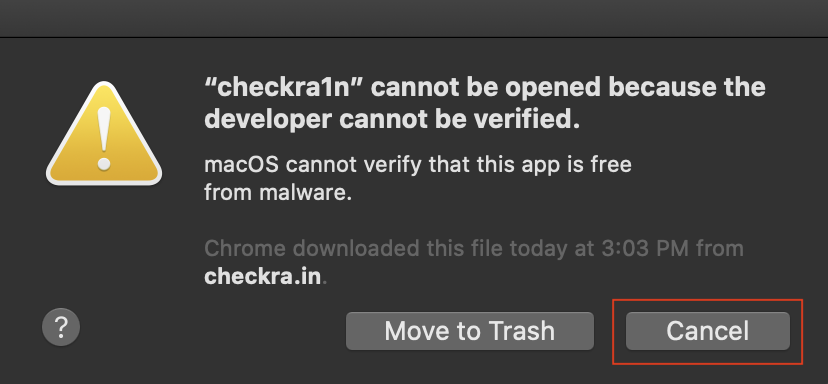
4. You will likely get a warning saying it cannot be opened because the developer cannot be verified. Click Cancel.
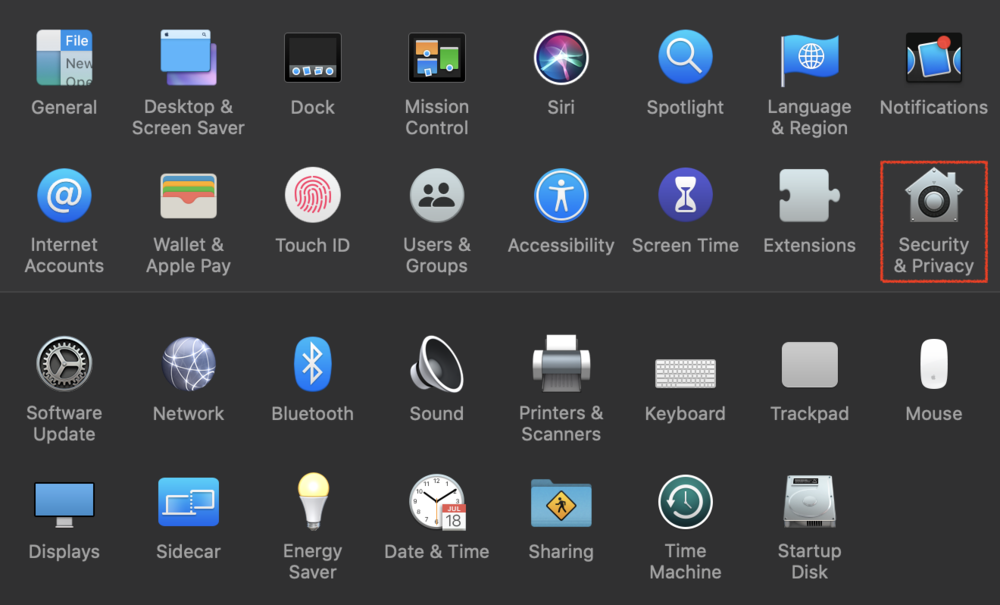
5. Click the Apple in the top left corner of your screen, then click System Preferences. Click �Security and Privacy� tab and open it. You will see a message at the bottom of the tab about checkra1n being blocked, click �Open Anyway.� Apple will show another pop-up asking if you�re really sure you want to open it, just say yes and click Open for the 12th time (just kidding). The checkra1n application is now installed on your Mac.

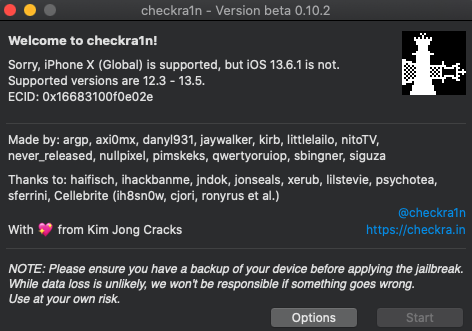
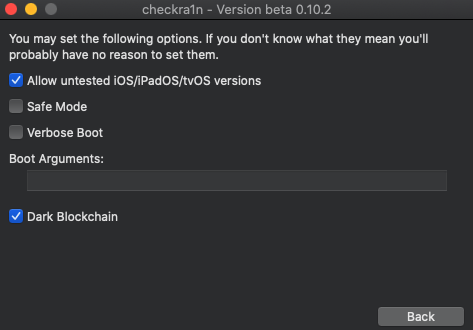
6. Press �command+space bar� and use Spotlight Search and type �checkra1n� again, and select it. This time the application will finally open. Typically you would want to connect your device and make sure it is supported, but for the purposes of showing off what checkra1n is capable of, I upgraded my test device to the latest version of iOS - 13.6.1 (8/21/2020). The window says it isn�t supported. If the OS version is tested and supported, you just simply click �Start� and off it goes. For an unsupported OS version on my iPhone X that is definitely susceptible to the checkm8 exploit, you can click �Options� and check the box beside �Allow untested iOS/iPad)S/tvOS versions.� Then go back to the main screen and click �Start� to make the jailbreak happen.
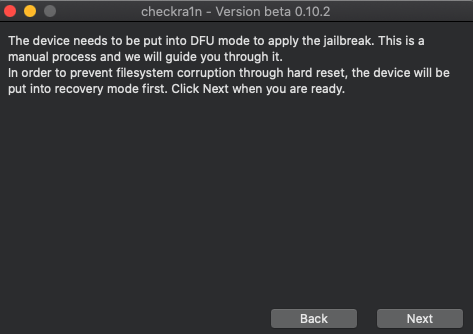
7. After another warning against running checkm8 on an untested OS version, it advances to a screen saying the device needs to be put into DFU mode. But first it puts the device into Recovery Mode to avoid any file system corruption.
 View Entire Post


![Analysis of Apple Unified Logs [Entry 12] � Quick & Easy Unified Log Collection from iOS Devices for Testing](https://images.squarespace-cdn.com/content/v1/53836afce4b0ea0513df946a/1599530291368-OP6TKIP4EFR5HMUGO7BE/giphy-4.gif)


