Follow(function(d, s, id) {var js, fjs = d.getElementsByTagName(s)[0];if (d.getElementById(id)) return;js = d.createElement(s);js.id = id;js.src = "https://www.bloglovin.com/widget/js/loader.js?v=1";fjs.parentNode.insertBefore(js, fjs);}(document, "script", "bloglovin-sdk"))*This post contains affiliate links. I receive small commissions for purchases made through these links at no extra cost to you.�These...
*This post contains affiliate links. I receive small commissions for purchases made through these links at no extra cost to you.�These commissions help me keep this site up and running, in order for me to keep providing helpful and inspiring art content. :)
?
Looking for new techniques to make your watercolor paintings more unique and interesting? What are watercolor blooms and how are they created?�
Watercolor is a challenging, but extremely rewarding painting medium.
As opposed to mediums like acrylics or oils, watercolor encourages us to be light-handed, to embrace surprises, and to not overly describe our subjects.�
Because plenty of water is brought in throughout the painting process, there's only so much that we can actually control.
In order to arrive at great watercolor paintings, we must learn to balance between strategizing and letting go.�
Yes, it's important to think critically and go in with a plan in order to arrive at the results that we're after, but it's also important to allow the water/paint to do their own thing and to embrace surprises that happen along the way.�
By learning new techniques, we develop a deeper knowledge of the medium and discover new ways to make more intentional use of the unique effects that watercolor allows.�
Blooms are one of the effects that this medium is known for. They are a great technique to know about, as they can help us add great visual textures, as well as deliberate points of interest to our artwork.�
?
?
Looking for new techniques to make your watercolor paintings more unique and interesting? What are watercolor blooms and how are they created?�
Watercolor is a challenging, but extremely rewarding painting medium.
As opposed to mediums like acrylics or oils, watercolor encourages us to be light-handed, to embrace surprises, and to not overly describe our subjects.�
Because plenty of water is brought in throughout the painting process, there's only so much that we can actually control.
In order to arrive at great watercolor paintings, we must learn to balance between strategizing and letting go.�
Yes, it's important to think critically and go in with a plan in order to arrive at the results that we're after, but it's also important to allow the water/paint to do their own thing and to embrace surprises that happen along the way.�
By learning new techniques, we develop a deeper knowledge of the medium and discover new ways to make more intentional use of the unique effects that watercolor allows.�
Blooms are one of the effects that this medium is known for. They are a great technique to know about, as they can help us add great visual textures, as well as deliberate points of interest to our artwork.�
?
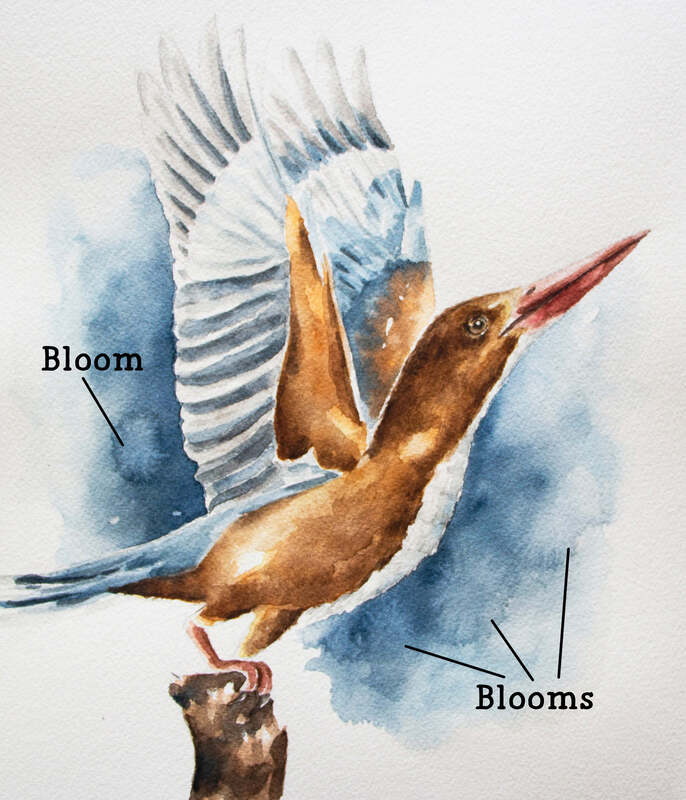
Kingfisher watercolor painting by Erika Lancaster.
?
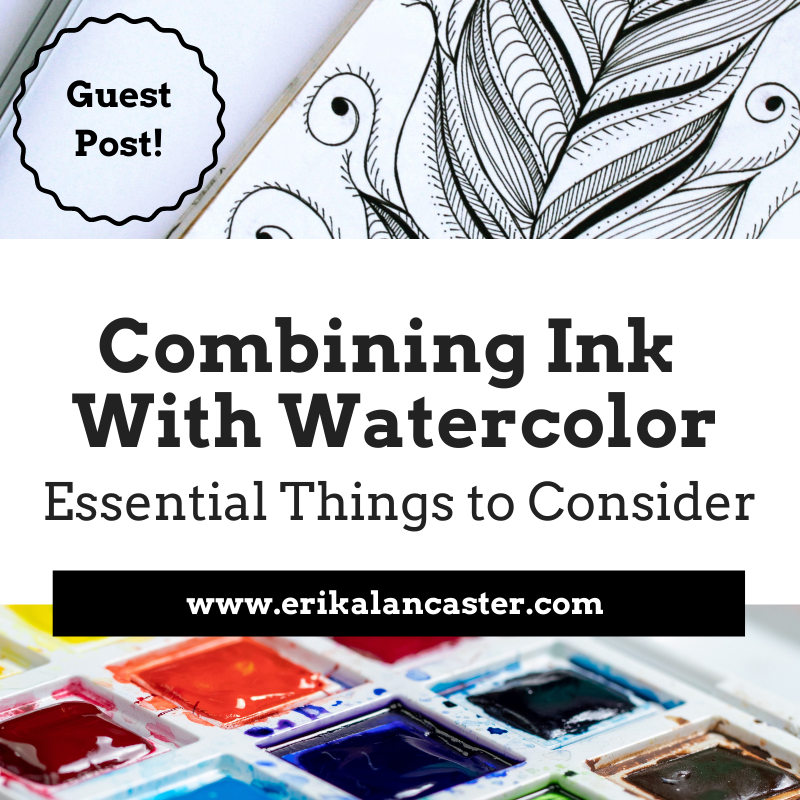
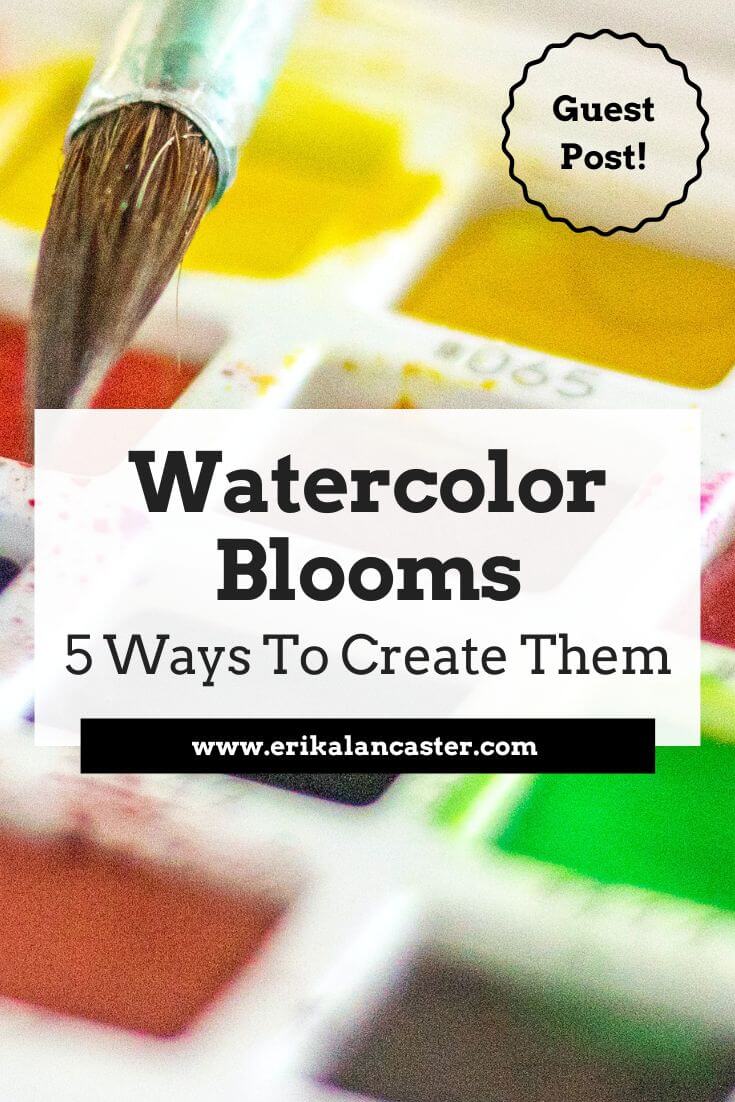
Today, I'm excited to share another very helpful guest blog post that shares lots of information about watercolor blooms, and 5 different ways they can be created.�
Dee Maene�is a London-based artist and art teacher. She has a deep love for watercolor and enjoys exploring different artistic mediums, including digital drawing and painting. Dee enjoys bringing in experimentation and play into her creative practice, and has a passion to encourage others to do the same. She likes pushing herself artistically, and strives to produce artwork that's not only beautiful, but meaningful.�
?
Without much further ado, let's jump into her article!
?
5 Ways To Create Beautiful Watercolor Blooms
?By Dee Maene
Watercolor blooms are a great way to add life to your paintings.�They are also not only incredibly satisfying to create, but relatively easy to do once you get the hang of water control.�
Blooms happen when a drop of water falls on wet paint and spreads, pushing the paint that's on the paper outwards. They can be created by dropping in clean water into paint, or by dropping in more paint into paint, as long as that initial layer of water/paint is still wet.�
?
Watercolor blooms are one of the most magical things that can happen when painting with this medium.�They are unique to watercolor and definitely add an element of surprise to the painting process.
Another reason why it's important to know different ways to create blooms, is because they enable us to create softer effects that have a more ethereal quality than regular brushstrokes, which can add variety and a touch of elegance to your paintings.
So, if you're looking to add a little bit of magic to your watercolor paintings, definitely try experimenting with blooms!
There's� a variety of different ways blooms can be created and, in this blog post,�I'll be sharing 5 techniques that you can start using today.
Technique 1: Dropping a Single Color On Water (Basic Watercolor Bloom Technique)
One of the simplest and most effective ways to create a watercolor bloom is to drop a single color into water that's been applied on your painting surface.
The bloom will happen naturally as the paint spreads out into the water. This technique is especially effective with darker colors, such as blues and greens.
Step-by-step process:
1. Pre-wet a section of your paper with clean water using a larger brush and going over the area at least 3-4 times to arrive at an even sheen.
2. Swivel your paintbrush in your container of water to pre-wet it, and load it with nice, juicy color you've prepared on your mixing palette.�
3. Touch the tip of your brush to the surface of the water.
4. Allow the color to drop from the brush onto the water.
5. Repeat steps 3-4 until you have achieved the desired effect.
6. Allow the bloom to dry before adding additional colors or details.
This basic technique can be used to create a wide variety of effects, from delicate flowers in landscapes and scenes, to textures and points of interest in abstract pieces.
With a little practice, you'll be able to produce beautiful blooms that are truly one-of-a-kind.
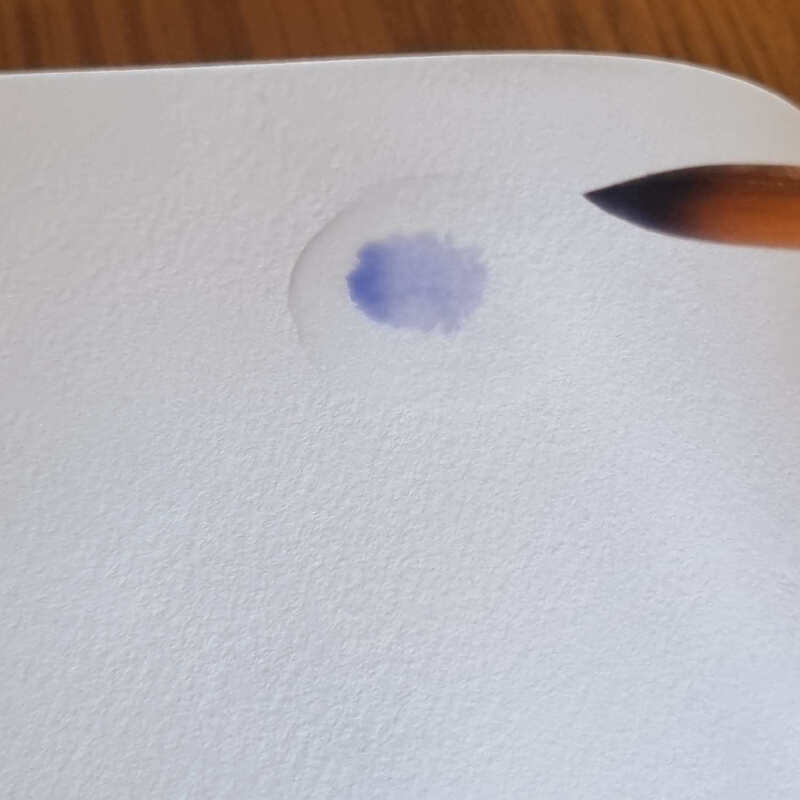
Dropping paint into wet paper.
?Technique 2: Dropping In Two Colors
The graded watercolor blooms technique is achieved by dropping two colors side-by-side on wet paper. The colors will mix together where they meet and create a bloom effect.
This technique is best achieved with two colors that have high levels of pigment, such as Magenta and Cobalt Blue.
It's important to work quickly when dropping the colors onto the paper, as you want them to mix together before they start to dry.
Also, make sure that you completely remove the previous color from your paintbrush bristles before loading your paintbrush with the next color.�
To create a more pronounced bloom effect, you can drop the colors from a higher height, farther away from the surface.�
This technique can be used to create beautiful and atmospheric paintings with a soft and ethereal quality. I often use this technique when creating�galaxy watercolor paintings.
?
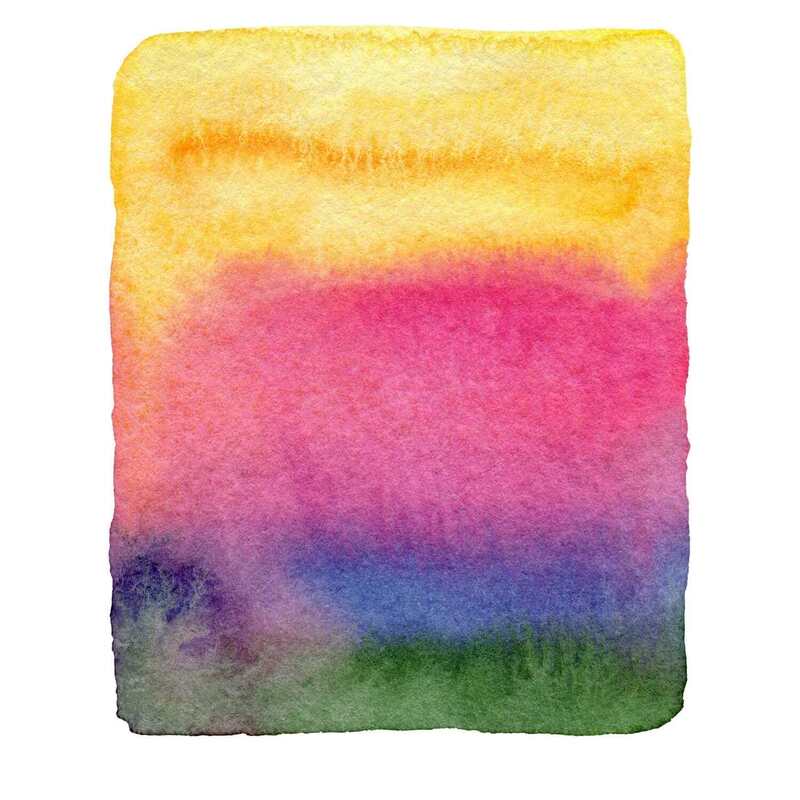
Dropping in a different color on or beside a previous color.�
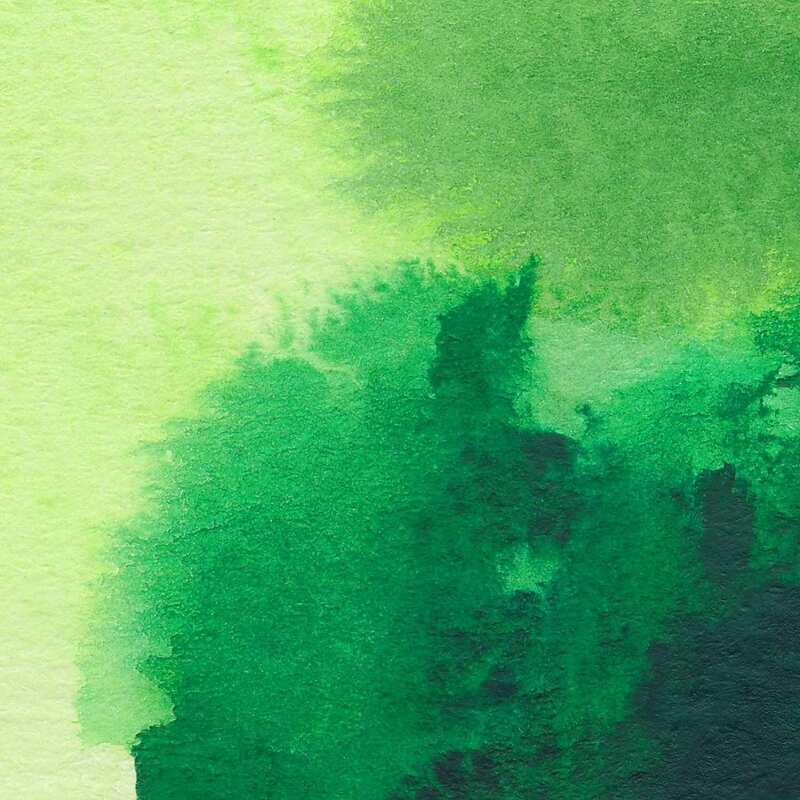
Technique 3: Using Salt
The salt technique is another great way to create blooms, though this one is more so used to create visual texture in larger areas.
By sprinkling salt on wet paint, you can achieve a variety of effects depending on the amount and type of salt used.
For example, coarse salt will create larger blooms, while fine salt will create smaller blooms. You can also experiment with different types of salt, such as Epsom salt and Kosher salt, to see what effects they produce.
In addition, you can control the intensity of the blooms by adjusting the amount of salt you use. A little salt will create subtle blooms and less visual texture, while a lot of salt will create more dramatic blooms and a higher visual texture.�
Whether you're looking for delicate flowers in landscapes, or to add snow into snow scenes, using salt is a great way to add interest to your watercolor paintings.
?
Step-by-step process:
1. Paint a wash of color on your paper (I'd recommend using a darker color).
2. Sprinkle in salt, while the paint is still wet.�
3. Allow paint to dry completely.
4. Dust off salt to reveal the beautiful visual texture.�

Dropping in salt into wet paint. *Left image shows salt granules just dropped into wet paint. Right image shows the texture created once the paint has dried and salt hast been removed.�
?
Technique 4: Dropping Clean Water Into Color
We can also create watercolor blooms by dripping clean water on wet paint.
The drop of water spreads and pushes the paint outwards, revealing more of the white paper underneath and creating a whitish bloom.
Step-by-step process:
1. Start by painting a shape on your paper with any color. You can drop in another color if you'd like.�
2. While the paint is still wet, use a dropper, a pipette, or a paintbrush loaded with only a small amount of water, to slowly drip water onto the center of the shape.�
3. Allow to dry.�
You can control the size and shape of the bloom by adjusting the amount of clean water you drop in. Experiment with different colors and techniques to create unique blooms.
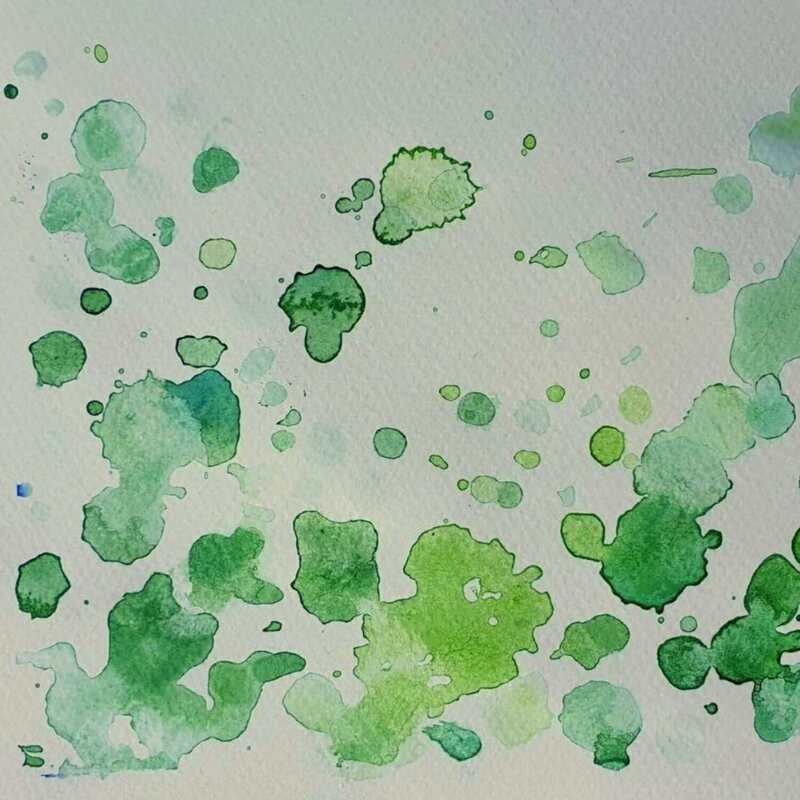
?By splattering clean water on wet paint, a mottled texture can be achieved via tiny blooms!
?
Technique 4: Dropping Clean Water Into Color
We can also create watercolor blooms by dripping clean water on wet paint.
The drop of water spreads and pushes the paint outwards, revealing more of the white paper underneath and creating a whitish bloom.
Step-by-step process:
1. Start by painting a shape on your paper with any color. You can drop in another color if you'd like.�
2. While the paint is still wet, use a dropper, a pipette, or a paintbrush loaded with only a small amount of water, to slowly drip water onto the center of the shape.�
3. Allow to dry.�
You can control the size and shape of the bloom by adjusting the amount of clean water you drop in. Experiment with different colors and techniques to create unique blooms.
?By splattering clean water on wet paint, a mottled texture can be achieved via tiny blooms!

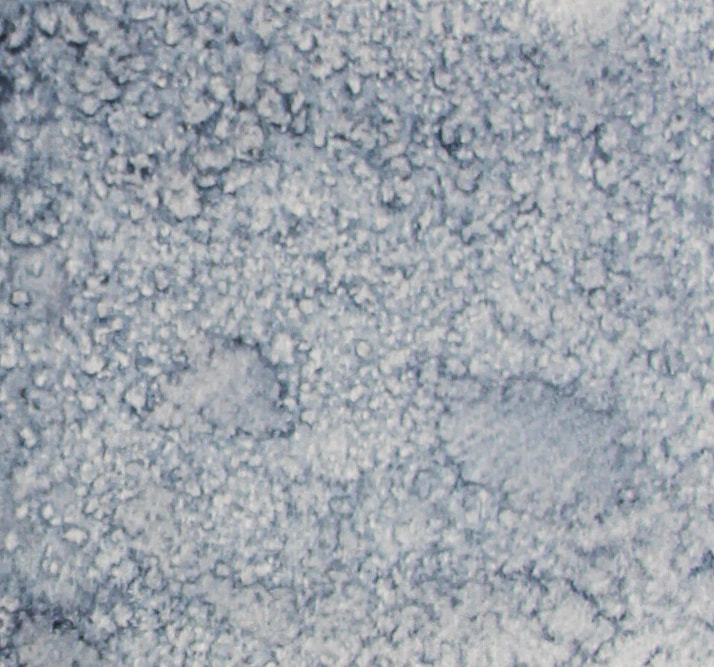
Dropping in water into wet paint. *Image on the left shows water that has been dropped into wet paint. Image on the right shows visual texture created when paint has been splattered onto wet paint.�
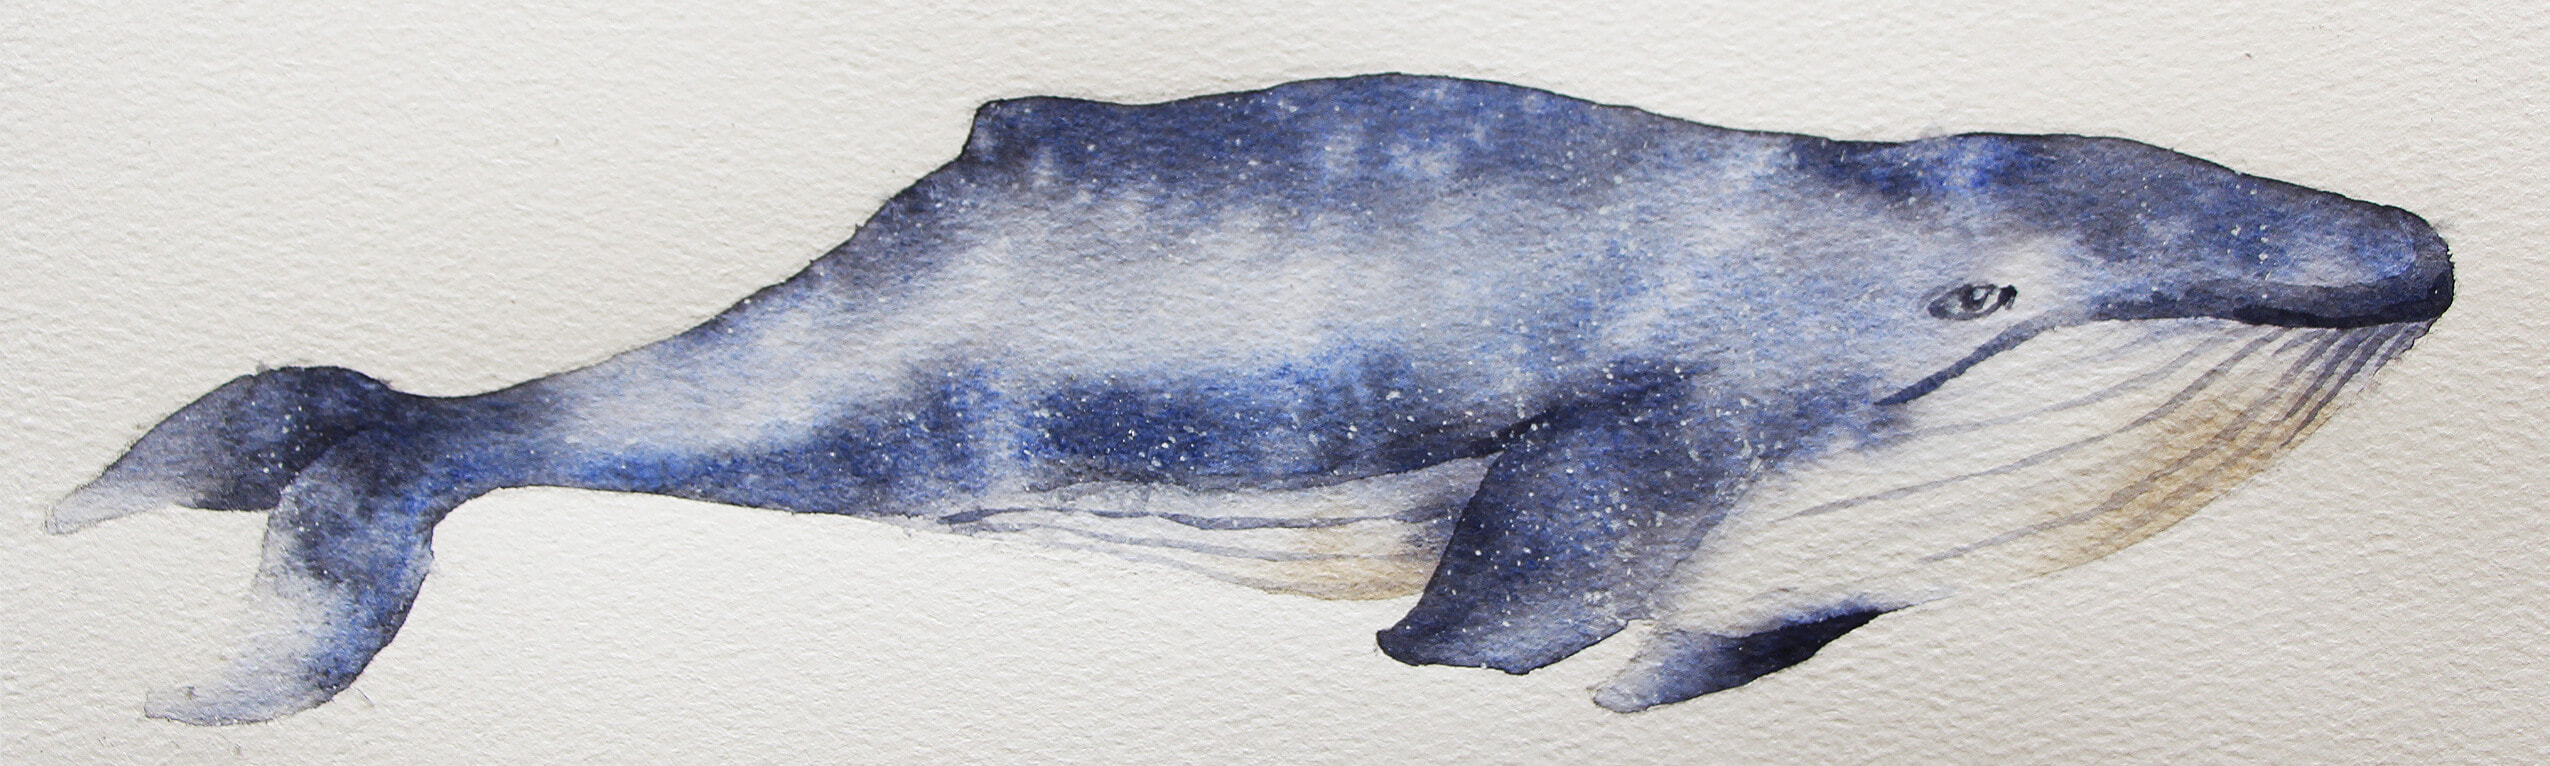
Watercolor Blue Whale by Erika Lancaster. Mottled texture was created by splattering clean water on the blue-gray color while it was still wet.
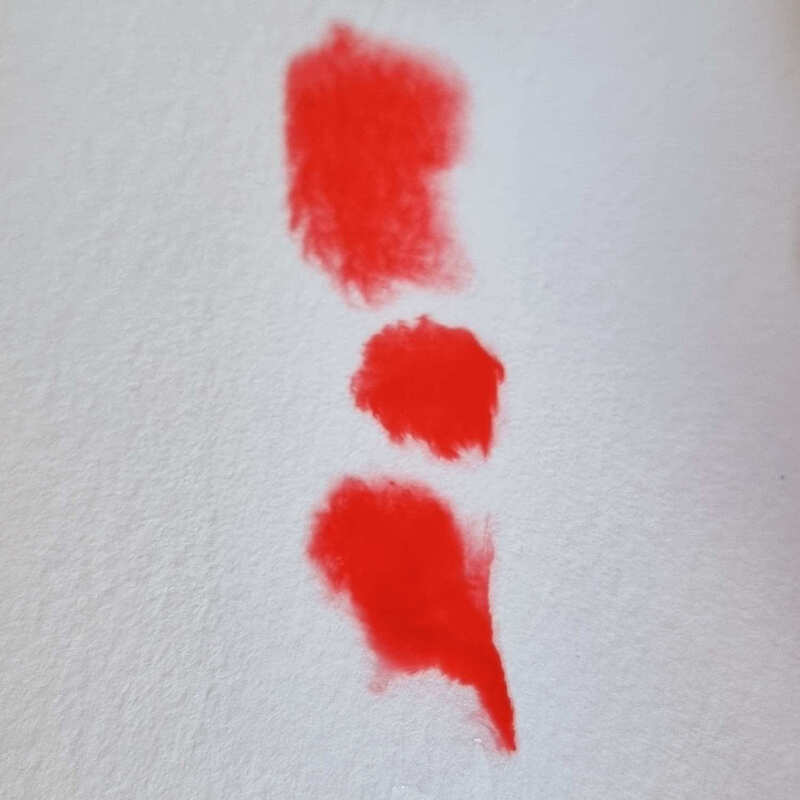
?Technique 5: Splattering Color Into Water
Flicking wet paint on wet paper, whether it's been pre-wetted with clean water or a colored wash has been applied, is an easy and fun way to create a speckled texture.
?You can use any color paint you like, but I find that using two or three colors works best.
The consistency of your color mixture has to contain a good amount of paint in it, and some amount of water. Make sure your mixture doesn't have so much water that you start dripping water all over your painting and too much water runs down your paintbrush as you're doing your flicking.�
Hold the brush close to the paper and then quickly flick your wrist so that the bristles hit the paper with a light tap.
?Another way you can do this by loading up your paintbrush with paint, and use your Index finger to flick your paintbrush bristles. This second option works great when you're using synthetic brushes that have spring-y bristles that "snap" back.�
You can experiment with varying the amount of paint on the brush, the type and size of paintbrush used, and the distance from the paper, to get different effects.
Once you've made a few dots, take a clean brush and blend them together lightly.
Add more dots if you want a fuller effect. Allow the paint to dry completely before framing or displaying your work.
?
?
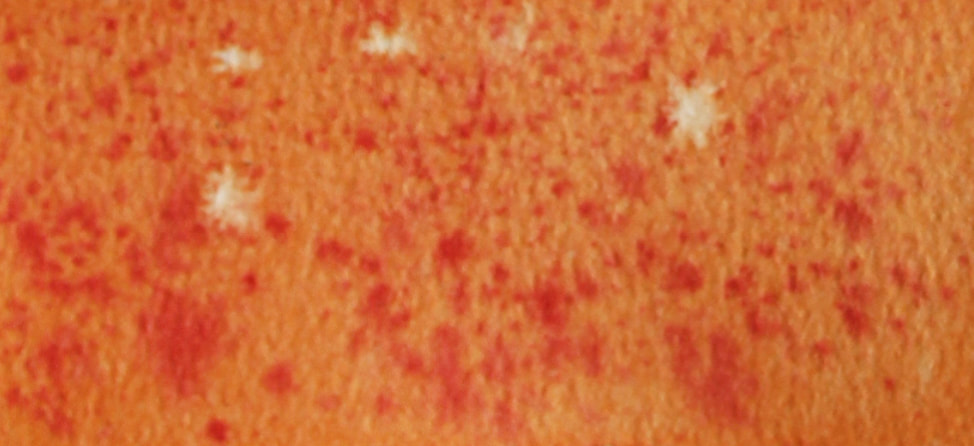
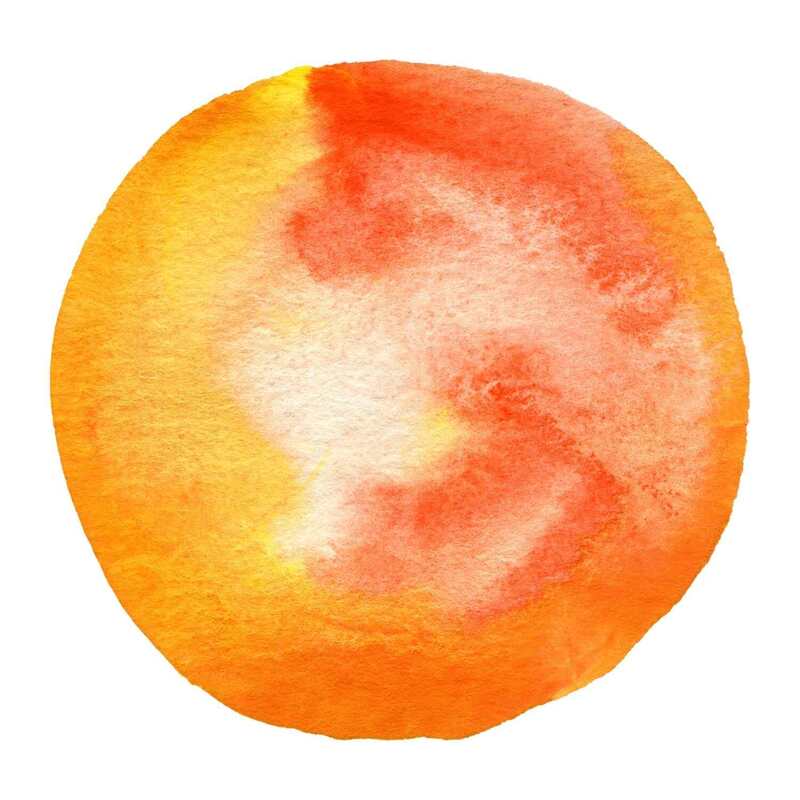
Flicking/splattering paint on wet paper. *Image on left shows two different colors splattered on paper. Image on right shows red paint splattered on orange paint that was still wet. The wetter the paper is, the more "blurred" and soft the edges of those shapes will be.�
Must-Know Tips For Better Watercolor Blooms
1. Choose the right type of paper
Different types of paper absorb water differently, and this can impact your painting. Choose a good-quality watercolor paper that is thick enough to hold the water without buckling or warping.
I recommend using a cold-pressed paper that is at least�140 lb/300 gsm. This type of paper is thick enough to hold the water without warping, and it will also give your painting a nice textured finish.
If you're looking for a smooth finish, you can use hot press watercolor paper. This type of paper has a smooth surface that is ideal for painting detailed blooms.
Just keep in mind that hot press paper is a bit more delicate and can warp more easily.
??
?
?2. Use a light touch
When painting watercolor blooms, it's important to use a light touch. This will help prevent the paint from spreading too much and ruining your painting.
If you want more control over the way your watercolor paint flows, use a smaller brush and add the paint slowly, building up the color gradually. I use a size��3 or 4 round brush for most of my watercolor blooms.
And remember, you can always add more paint if you need to, but it's much harder to remove paint once it's on the paper. So start with a light touch and then build up the color gradually until you get the effect you're looking for.
3. Add water sparingly
Too much water can cause the paint to run and make your blooms look muddy. Add water sparingly, and only when necessary, to avoid this problem.
I like to use a small spray bottle to mist my paper before I start painting. This gives the paint something to cling to so that it doesn't run too much when I add water.
If you do accidentally add too much water, simply blot the excess moisture with a paper towel. Be careful not to rub the paint too hard, or you'll end up with a blurry bloom.
4. Use different colors for variation
One of the best things about watercolor blooms is that you can use any color you want. To add interest and variation, try using two or three colors instead of just one.
I like to use a light color for the base of the bloom and then add a darker color around the edge. This creates a nice contrast that makes the blooms pop.
You can also experiment with different color combinations to see what you like best. Just remember to stay within a similar color family so that you don't accidentally create a color you don't want when they start intermixing.�
5. Experiment and have fun
The best way to learn how to paint watercolor blooms is to allow yourself to explore, simply for the fun of it. Try different techniques, colors, and papers until you find a look that you love.
And don't be afraid to make mistakes. Watercolor is a forgiving medium, and even the most experienced painters make mistakes. Just relax and enjoy the process.
With a little practice, you'll be able to create beautiful watercolor blooms!
?
?
Frequently Asked Questions
What is a bloom in watercolor?
A bloom is a type of�watercolor painting technique�where paint is spread outwards from a central point, creating a flower or cauliflower-like effect.
How to avoid watercolor blooms?
There are a few things you can do to avoid watercolor blooms: use the right type of paper, use a light touch, and develop great water control.
It's all about making sure that the amount of water�in your paint mixtures,�in your paintbrush bristles, and�on your paper�is what you need for what you're trying to do. If there's too much water in any of these, or not enough, it'll be hard to arrive at the effects you're after.
This is why we have to�constantly�check on these three things during the painting process.�
What causes watercolor blooms?
Watercolor blooms are caused by adding water to wet paint. The water disturbs the paint, pushing it outwards and creating a bloom effect.
How do you control watercolor blooms?
You can control the size and shape of watercolor blooms by adjusting the amount of water you add.
Experiment with different techniques to get the results you want.
What causes back-runs watercolor painting?
Back-runs are created when we drop in�way�too much water (or watery paint) on paint that is still wet.
If our paper is still wet, and we're going to be dropping in paint or clean water to create blooms, we have to be in control of the amount that we're dropping in. If too much drips down, it can flow into areas we don't want and we can create splotches.
It's all about water control!
The more you practice, the more easily you'll be able to tell when there's way too much water in the three key areas mentioned before (paint mixtures-paintbrush-paper).
You'll intuitively change the paint-to-water ratios in your mixtures, load up your paintbrush more or less, and add more water to your paper (or allow it to dry), depending on what you're intending to do in that point in time in the painting process.�
?
Practice these five key techniques to create beautiful blooms in your watercolor paintings. Remember to experiment and have fun with this medium � the possibilities are endless!
??
?
I hope this post was helpful and inspiring for all of you getting started with watercolors!
Thanks�so�much to�Dee Maene�for so generously sharing all of this useful information with us.�
?
Thank you for reading and I wish you tons of progress and enjoyment in your art journey.
?