We have created some pretty epic Halloween art projects over the years so we thought it was time to put them all in one place! From spin art to shaving cream marbling, and puppet making to artsy haunted houses....
We have created some pretty epic Halloween art projects over the years so we thought it was time to put them all in one place! From spin art to shaving cream marbling, and puppet making to artsy haunted houses. There is a little something for everyone!
�new! Halloween template bundle
featuring 10 super fun, tried and true ART CAMP Halloween art + craft projects with shape templates + collage sheets
The Ultimate Halloween Art Project Template Bundle $25.00 Add To Cart** Please note that we participate in the Amazon Affiliate program. This means if you purchase any of the products linked here we will receive a tiny sales commission at no additional cost to you. We only link to products we use and love. Your support helps us keep this site running - thank you!
1. Haunted Stick Mansions
ART CAMP Pro
Are you a private studio owner, art educator, or kids art business?
We are building an online community that offers ongoing professional training and project licensing for commercial use.
This new platform will allow us to serve our Pro community members at a more accessible price point.
Your sign-up will give you access to all the first come first serve perks. Exclusive content, Live sessions, Q+A opportunities, and you will be at the front of the line when doors open for enrollment!
Join the listWe won't send you spam. Just the good stuff!

materials:
bat, ghost, and pumpkin, and full moon templates are available in the ultimate Halloween art project bundle
You can take ideas from the examples, or create your own. Notice that the houses in each of the examples are asymmetrical. Nothing is a perfect square. The walls, roofs, doors and windows are all leaning and uneven. This small detail will give your haunted house a spooky and run-down look.
Step 1: Paint 20 stir sticks black and give them time to dry. *Only one side needs to be painted.
Step 2: Start by laying out a design (walls and roof) for your haunted house. Use your hands to break your sticks to make them the right size. When you have your house the shape you want, use your school glue to keep everything in place on your grey cardstock.
Step 3: Now that the outline of your house is in place, it's time to add windows and doors. You will again need to break your sticks to make them smaller. Lay out your windows and doors before adding glue. When you have them in the right place, glue them down.
Step 4: Add other features and details. An uneven set of steps, a rickety picket fence around your house�s foundation, a leaning chimney coming off the roof, or even a wobbly second story to your haunted house.
Step 5: Color in the sections of your haunted house using your chalk crayons. No need to color neatly! Press down firmly and color in every direction to create texture with different colors.
Step 6: Choose images to cut out from your template (pumpkin, ghost, moon) or draw your own and add them into your picture with a little glue.
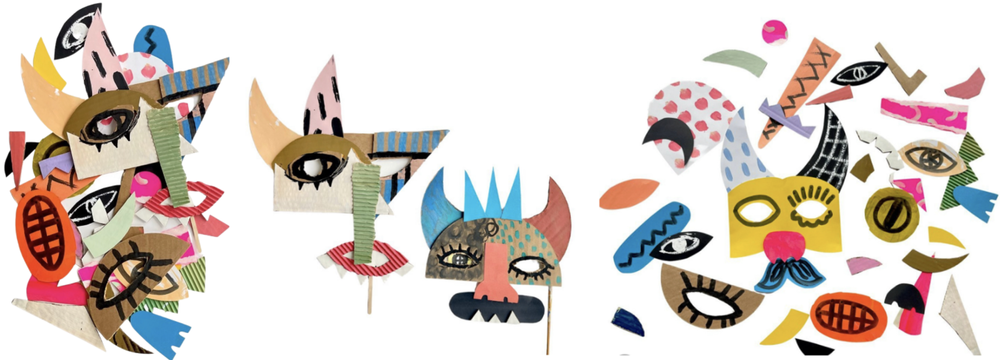
�2. Imaginary Creature Masks
materials:
colorful artsy leftovers in a variety of materials (card stock, old paintings, collage papers, painted cardboard)
skinny dowels if you want to mount the masks to a stick
What do you do with papery bits and off-cuts from projects past? We like to save them and pull them out for projects like this one! It�s really fun to look at �artsy leftovers� in a new way. For this mask-making-buffet we paired our colorful scraps with black and white tempera paint sticks and India ink-filled-daubers for a bold graphic punch.
�3. mixed media Kusama Pumpkins
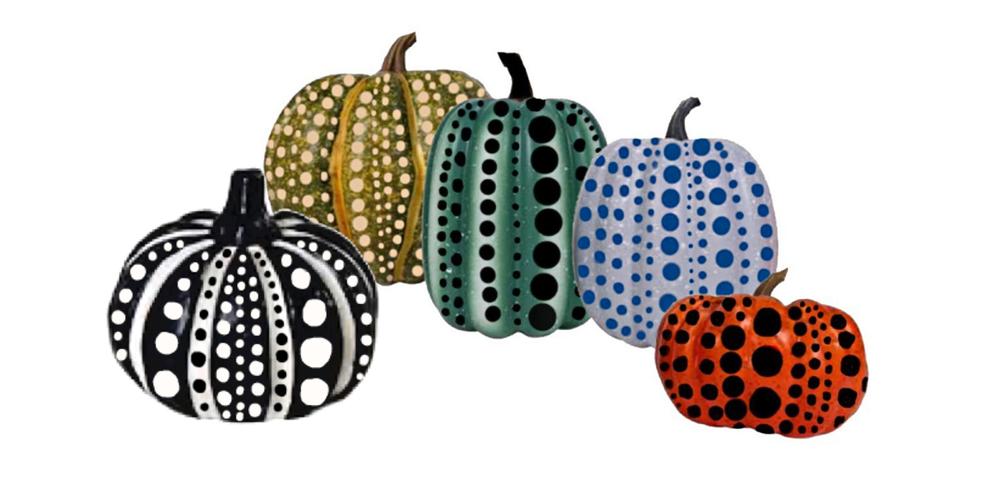
I can�t look at a pumpkin without thinking of Yayoi Kusama�s pumpkins! There are so many wonderful interpretations of her gorgeous colorful spotty pumpkins. There are a few ways to explore pumpkins and dots. You could have artists dot real pumpkins, faux pumpkins, clay pumpkins or Papier M�ch� pumpkins. In our Halloween Template bundle we have included some colorful pumpkin shapes for you to dot. Cut them out and string them onto twine for a very fun and artsy garland!
How many items can you find around the house or classroom that can make a dot? Here are some of our favorite ways to make a dot:
pumpkin templates available in ultimate Halloween art project bundle
india ink and ink daubers
finger prints
the back of an pencil eraser
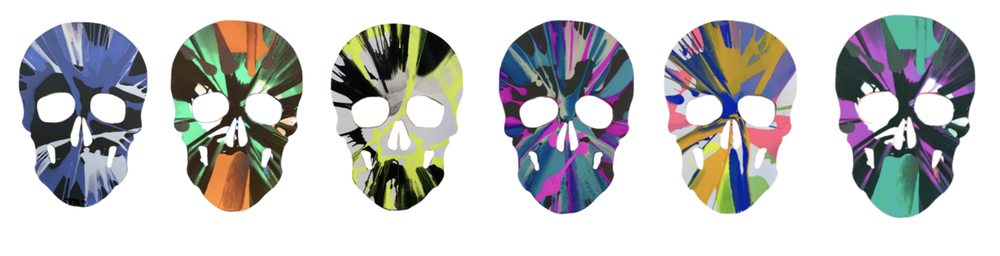
�4. Spin art skulls
 Spin Art Skull Project Inspired by Damien Hirst - Project PDF + Templates
Sale Price:$9.99 Original Price:$30.00
Add To Cart
Spin Art Skull Project Inspired by Damien Hirst - Project PDF + Templates
Sale Price:$9.99 Original Price:$30.00
Add To Cart
Spin art is a process that is always a hit with artists big and small. The skulls are a homage to UK pop artist Damien Hirst.
*Please note that this project is not featured in the Halloween Bundle. You can find the full project plan that includes materials, steps, �about the artist� pages, and templates here.
�5. Mixed Media Spooky Scrolls

materials:
spooky scroll collage sheet available in ultimate Halloween art project bundle
chipboard or a cereal box cut into a long rectangle
bendy wire for hanging loop
printed paper, corrugated cardboard, spooky Halloween images and cut outs, old paintings, newsprint
Step 1: Cut your rectangular scroll shape from chip board or thin cardboard.
Step 2: Use a hole punch to make two small holes at the top of your scroll.
Step 3: Use bendy wire to make a hanging loop.
Step 4: Create a layered collage starting with big pieces for the base layers. Cut, tear, stack, and fringe colors, textures and imagery. It�s fun to add a little 3-D pop on the top layer. Think: pom poms, spiders, glitter balls, cob webs etc.
�6. Kitty Witch, Skelly and ghost puppets
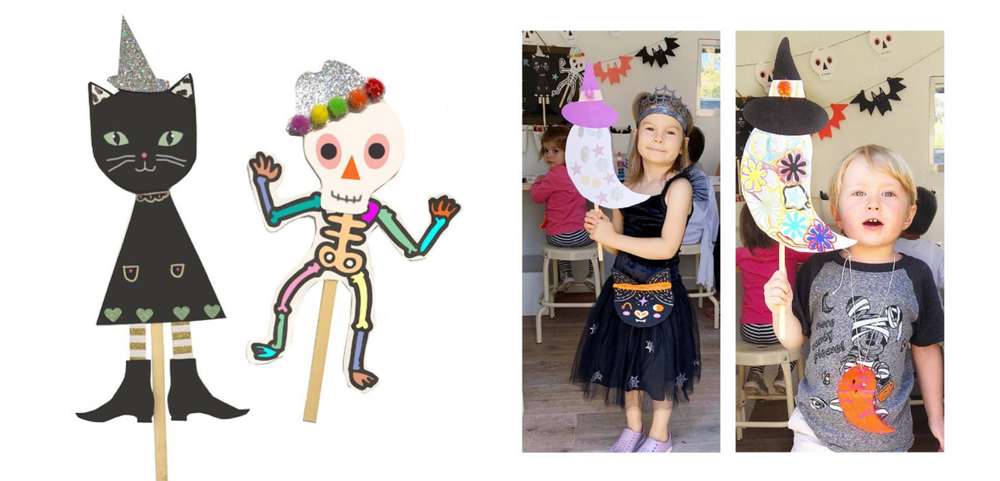
Meet Kitty Witch, Skully and Mr. Ghost! These fun friends have made an appearance at many a halloween party over the years. You can find the template for all 3 inside the Halloween Template Bundle.
materials:
Kitty witch, ghost and skelly templates are available in the ultimate Halloween art project bundle
coloring material of your choice: we love chalk markers, colored pencils, chalk crayons, and metallic markers for this project
wooden dowel or stick
optional but fun: pom poms, glitter or stickers
Step 1: Choose your puppet character from the templates and cut it out.
Step 2: Accessorize your puppet character using the coloring material of your choice. A page of collage patterns is provided in the Halloween Template Bundle for you to draw and cut from. Use a glue stick to glue on any collage pieces.
Step 3: When you are done coloring, decorating and accessorizing, use your glue stick to attach your wooden dowel to the back of your puppet.
�7. Black Cat Drawing Project
 Kitty Witch Directed Drawing Guide
Sale Price:$9.99 Original Price:$15.00
Add To Cart
Kitty Witch Directed Drawing Guide
Sale Price:$9.99 Original Price:$15.00
Add To Cart
If you are looking for a Halloween drawing project that you can complete from start to finish in 45 minutes, that uses simple supplies, and delivers a WOW result.. look no further! This kitty witch project is fun for artists of all ages. Grab the complete step-by-step drawing guide here.
Materials: Black marker, chalk pastels (black, yellow, orange), and cotton balls.
�8. Howling wolf moon project
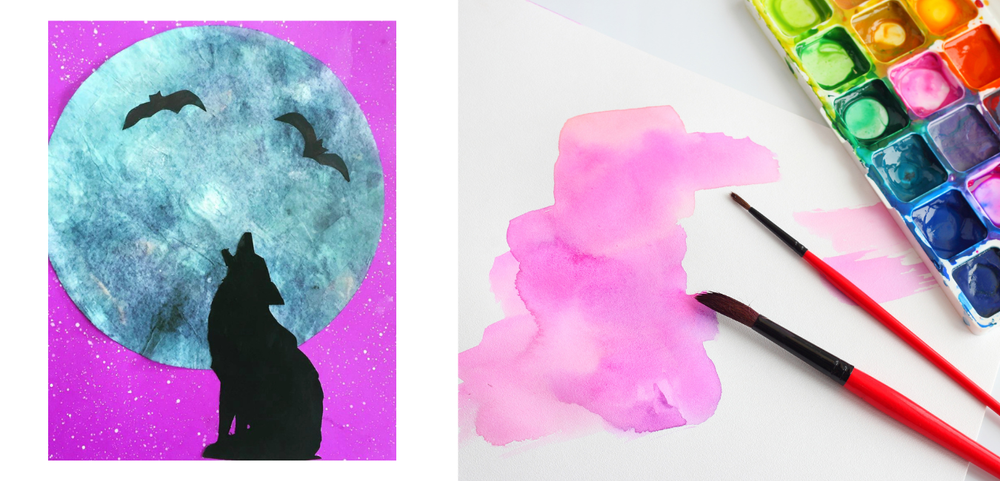
This project is a Halloween art project that is sure to be a hit with your littles! The supply list is short and the steps are simple, festive, and fun!
materials:
howling wolf and bat templates are included in the ultimate Halloween art project bundle
bright cardstock or paint a colorful night sky for background
water cup + paint brush
diluted white paint (we use acrylic)
liquid watercolor or food coloring
Step 1: Paint a bucket style coffee filter with liquid watercolor or food coloring (we used turquoise, navy, black and peach).
Step 2: While your moon is drying you will sketch out your wolf and bat shapes on black construction paper or card stock. If you don�t have black paper, you can draw on white and fill it in with a black marker or black paint.
Step 3: Cut out your wolf and bat shapes and grab a bold colorful sheet of paper for your background. You can also extend the art-making and create a painted background for your howling wolf silhouette.
Step 4: Splatter stars on your background paper using diluted white paint, water, and a paintbrush. If you want to create small stars hold your brush higher above your paper and tap gently.
Step 5: When your background paper and coffee filter have dried completely it is time for assembly. Glue your moon to the upper half of your background paper. Glue your wolf to the bottom of the paper overlapping the moon slightly. Then add a few bats in the distance on the upper right section of your moon. If you want to work from our shapes you can grab the template here.
�9. Ghost garland

Some might call this a Pac-Man Ghost Garland, and some little people might call it a Funny Ghost Garland� we call it colorful cuteness that will bring cheer to any wall. Head over to the full post to read about the inquisitive mind that inspired this DIY. While you�re there, get your free ghost templates!
materials:
80�s style ghost template is available in the ultimate Halloween art project bundle
assorted felt (we like these ones because they are stiffer and easier to cut)
glue gun and/or double-sided sticky tape
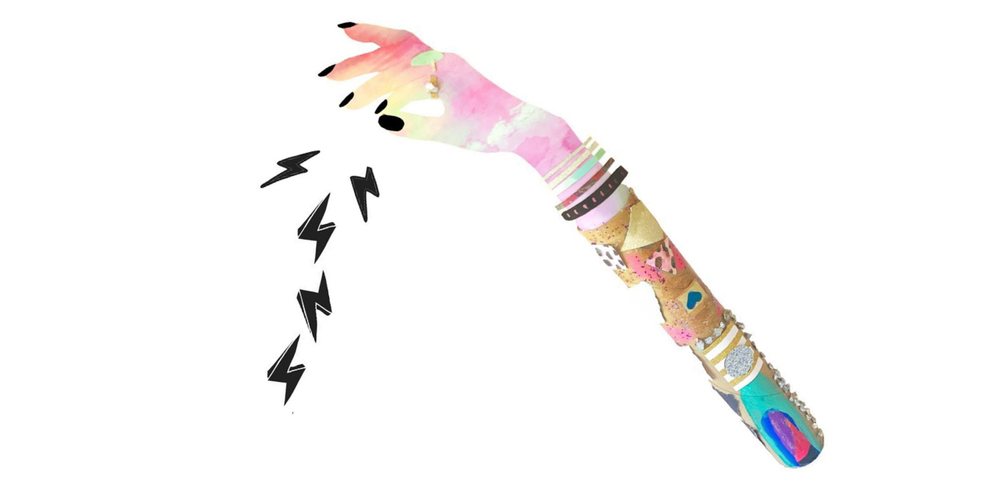
�10. spell hands
 View Entire Post