JUnit is an opensource unit testing tool that helps to test units of code. It is mainly used for unit testing Java project, however it can be used with Selenium Webdriver to automate testing of Web applications. To be...
JUnit is an opensource unit testing tool that helps to test units of code. It is mainly used for unit testing Java project, however it can be used with Selenium Webdriver to automate testing of Web applications. To be precise JUnit is a unit testing framework for java that helps to write test cases in a more structured and better format. Selenium and JUnit can be used independently of each other though combining both helps to write test cases in a more structured way. This article references automating application using JUnit and Selenium through a simple script.
We will be walking through the following sections:
v Step 1- Downloading Junit Jars
JUnit�jar files can be downloaded from https://github.com/junit-team/junit4/wiki/Download-and-Install. The major jar files included are:
Download and save these files in your system.
v Step 2- Adding jars to your selenium Project
In order to add your�JUnit�external jar files into your project, you need to have your eclipse setup and selenium jar files downloaded. In order to install eclipse you can refer its official website https://www.eclipse.org/downloads/. Based on your operating system windows or OS, you can download accordingly. Post eclipse setup you can download your selenium jar files from its official website https://www.seleniumhq.org/download/. In order to create your selenium webdriver scripts you need to use user language specific drivers. In our case we are using Java, though selenium support multiple languages like c#, Ruby, Phython, Javascript along with Java. Download the selenium jar files and include them into your eclipse workspace, now we need to include our downloaded�JUnit�Jar files. Follow the below steps to do so:
o���
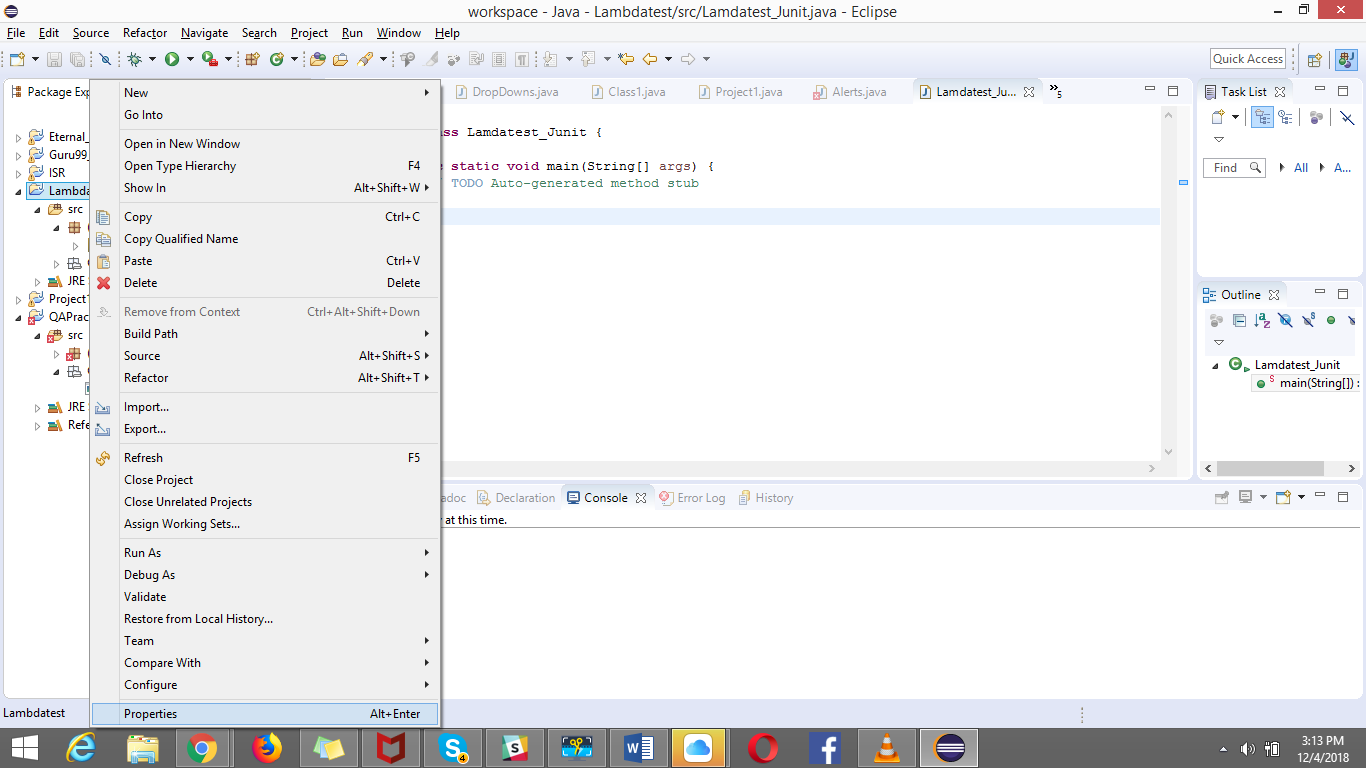
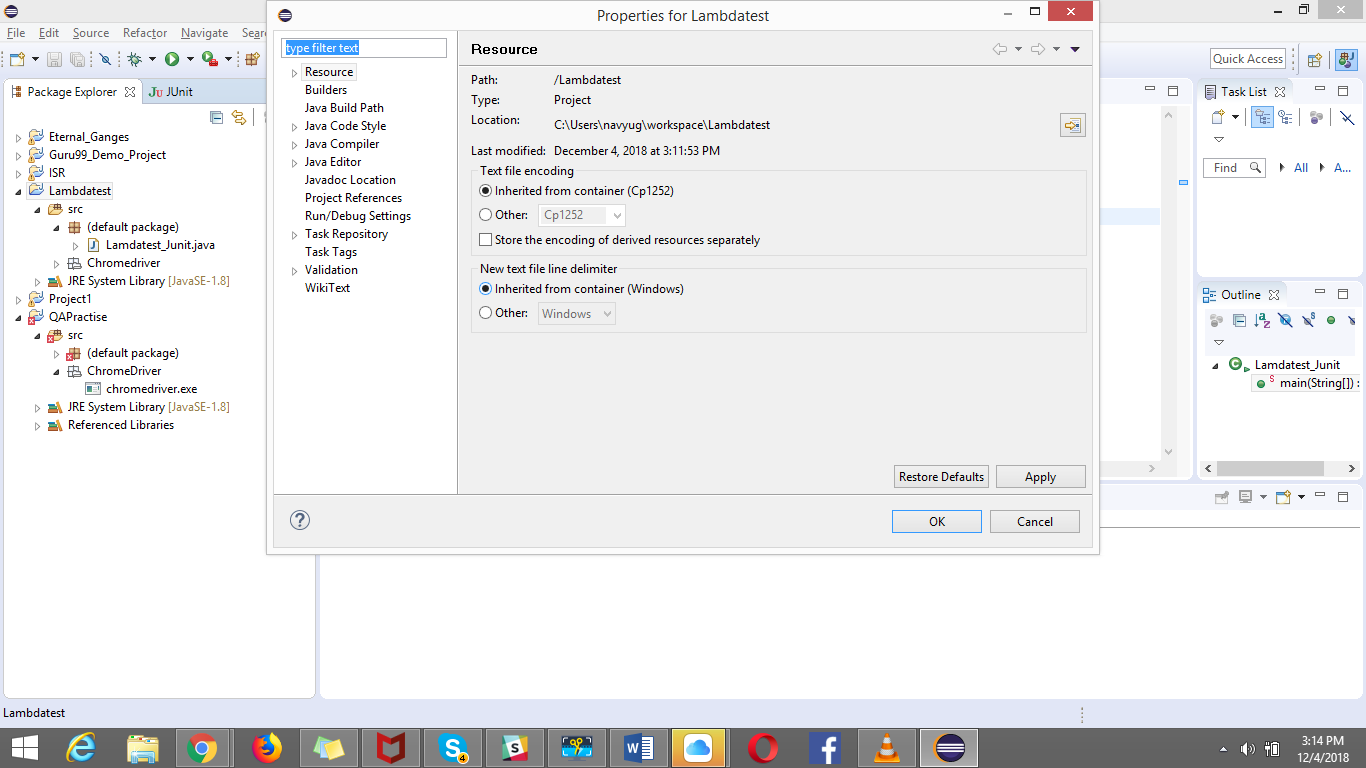
o�� Click on the �Add external Jars� button and add your downloaded�JUnit�Jar files and click �OK� post that:
This adds the�JUnit�jar files to your selenium project. The major class file/source files that are commonly used in this�JUnit�Jar files are:
For detail list on the class files or source files refer http://www.java2s.com/Code/Jar/j/Downloadjunitjar.htm .Now lets incorporate�JUnit�into your selenium project.
v Step 3-Incorporating�JUnit�to your selenium script
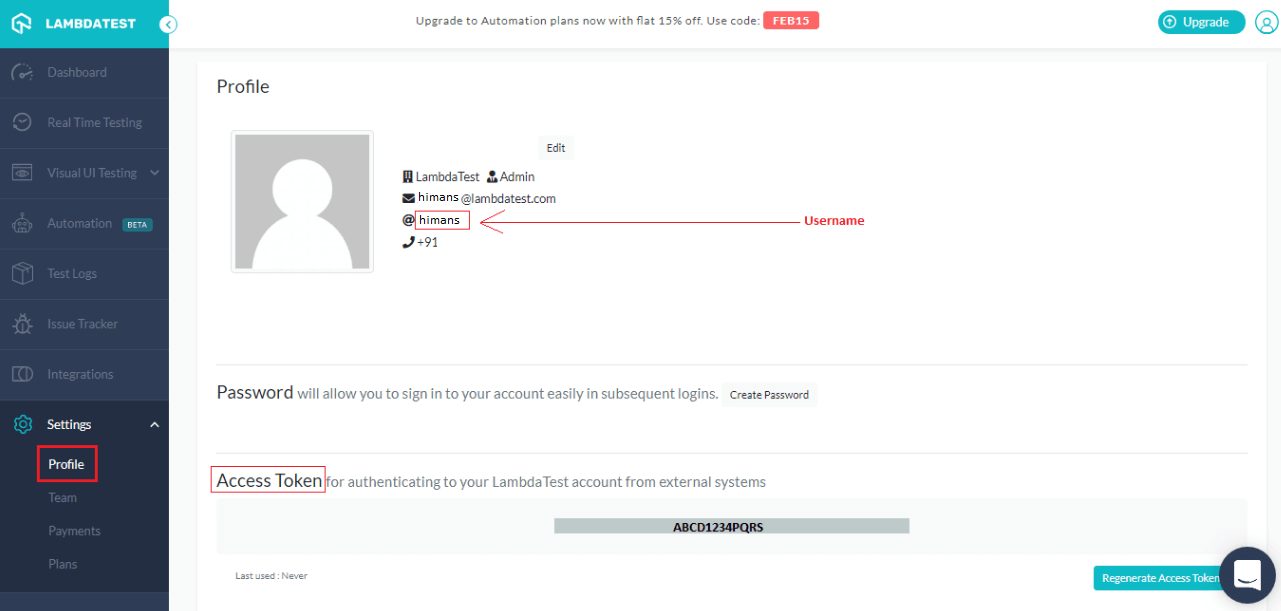
We will be creating our first�JUnit�selenium simple script on https://www.lambdatest.com/ .
Details:
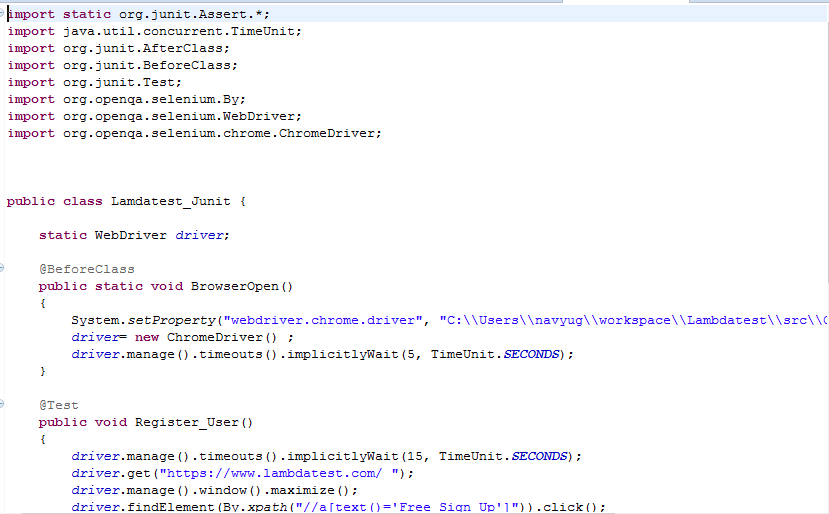
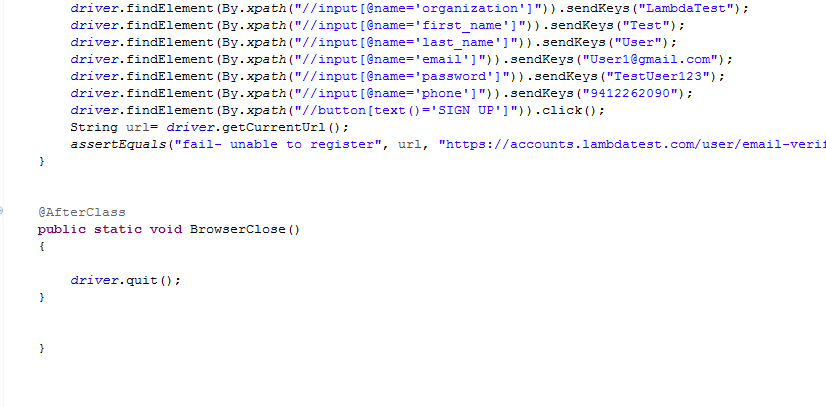
The above script opens the browser with https://www.lambdatest.com/ and clicks on �free sign up� button to register. Post register, the script will check the URL it is redirected to in order to ensure successful registration. We have used two classes of�JUnit�one is Annotations class and the other Assertions.
The script consists of three sections:
� @BeforeClass � This annotation runs the piece of code before starting any annotation in the class. As you can see, here we have opened the chrome browser before performing any action on it. The main actions are performed in the @Test annotation marked method.
� @Test � This test method carries the functionality where the application is opened and registration process is carried out. To validate the result we have used assertion class where we are validating the success of the registration process using the context of current URL. This test annotation runs the piece of code after the @BeforeClass and @BeforeTest method and before the @AfterTest and �@AfterClass method.
� @AfterClass- This annotation tells�JUnit�to run the piece of code once all the test have been executed. This annotation method usually carry process of closing the browser post all action items have been performed.
Attaching video of the execution of the above script:
�����������������������������������
�����������������������������������������
Testing Cloud application via�JUnit�and Selenium
Cloud testing means testing cloud-based applications that are hosted on cloud. Using selenium along with�JUnit�to test cloud services for web apps becomes the most obvious choice due to its capabilities to run script on multiple browsers and platforms with any language support one choose for. With the use of�JUnit�it provides a more structured way of writing your test that leads to better maintenance, quality and effectiveness as compared to without using any frameworks like�JUnit�. Using Maven and Jenkins with Selenium and�JUnit�helps make a more powerful, smoother and end to end automation experience for cloud-based application, thereby providing for robustness to the whole flow.
Closing my article with the below quote from�Jim Hazen
�It�s automation, not�automagic.�
I have contributed this same article for�lambdatest�on their blog�https://www.lambdatest.com/blog/automated-testing-with-junit-and-selenium-for-browser-compatibility/
Author: Sadhvi Singh
About Author:�http://qavibes.blogspot.com/p/about-author.html